Chicken in Apple-Cream Sauce
I can’t believe how long I have been making this dish. When I first made it, my daughter was 11 and my son was 5, boy oh boy, that is hard to fathom right now. I just made it again tonight, 14 years later…….
Needless to say this is another kid friendly dinner, served with noodles, from fine to broad or rice: I’ve done them all. Tonight it was fine noodles and a simple salad.
I have used many different varieties of apples and each one imparts a little different flavor, which is fun. The frozen apple juice can be any kind, it doesn’t matter. Make sure you have heavy cream. I have tried to get away with half and half but it’s just not the same. I even forgot it entirely one time (that’s why I now make sure to put it next to the pan while the chicken is simmering, that way I won’t forget). It was ok but I like it a lot more with the cream!
Chicken in Apple-Cream Sauce (adapted from First for Women Magazine)
1 large onion
1 lb. of apples (2-3 depending on the size)
1/4 cup flour
1 teaspoon dried thyme
1 pound of chicken tenders
2 tablespoons of butter
2 tablespoons of olive oil
1/2 cup of frozen concentrated apple juice
1/2 cup of water
1/2 cup heavy cream
Finely chop the onion and set aside. Cut apples into 4 wedges, peel and core. Finely chop by hand or with the Cuisinart Mini-Prep. Finely chopping the apples is important. They need to cook quickly because the chicken tenders cook in no time at all. Set aside the chopped apples. Put frozen concentrated apple juice in glass measuring cup and add water. Stir to dissolve and set aside. In a plastic bag, put flour and thyme. Prepare chicken tenders by cutting the white ligament out (see post Chicken Tender). Put chicken in bag and toss to coat thoroughly.
Heat butter and olive oil (I love this combination, the best of both worlds. The great cooking qualities of olive oil and the wonderful taste of butter) in a large saucepan over medium heat. Place chicken in saucepan and saute until nicely browned, about 10-15 minutes. Remove chicken and set aside.
Add onion to saucepan and cook until lightly browned, about 5 minutes, scraping up brown bits from chicken.
Add apples to saucepan and stir to combine with onions. Place chicken on top and pour apple juice mixture over everything. Turn heat up to high and bring to a boil. Then reduce heat to medium low, cover and simmer for 20 minutes. Measure out heavy cream and set aside next to sauce pan.
When the 20 minutes are up, uncover and push aside the chicken. Using a metal spatula, smoosh the apples a little bit more. They will still be somewhat chunky and that’s fine. Turn off the heat and add the heavy cream, stirring it in gently, using the metal spatula. Serve with noodles or rice.
Weighing out the apples. See how the Scale comes in handy?

Concentrated apple juice and water:

Chicken sauteing in butter and olive oil:

Chicken browned and ready to be put aside:

Onions cooked:

Chicken placed on top of onions and apples:

Apple juice mixture poured on top:

Simmering:

Smooshing the apples:

Added cream and stirred:

Ready to eat!

Philosophy: Convenience Foods
I was perusing through my new issue of FoodNetwork and there was a recipe with not one but two convenience foods listed. Ok, convenience foods are great I guess. I use a few when I’m in a pinch and don’t have the real thing or I’m too lazy to make the real thing. But the real thing is better. You will never know how much better until you make it.
I used to subscribe to Southern Living Magazine and got great recipes from it for many years. But then they switched to using ALOT of convenience foods in the recipes and I stopped subscribing.
My mother made everything from scratch, everything. We had a long-standing joke in my family, that we should make a cake mix and the brand label should read: From Scratch, so that when people asked how you made it, you could say, “I made it From Scratch !”. We thought that was hysterical. So you can see where my head is coming from.
When I was younger, like High School (omg, that seems like an eternity now!) I took it a step further. I was just curious about how things were made that you would just normally buy at the store. So I made marshmallows (lo and behold, you can now find dozens of recipes and varieties of marshmallow now!) and soap. And I still have that curiosity. Fortunately with the internet, you can find out how to make almost anything, including cheese, which is my next new adventure!
For all that do not understand the meaning of “made from scratch’ I dug up this definition from How to Cook Gourmet: “To make an item, usually baked goods, from the raw ingredients, without using a mix or processed convenience products….” With this comes the understanding that with using basic ingredients, you have more control. More control of the salt, the fat, the spiciness . Making food more to your taste and your family’s tastes. To me this is the ultimate pleasure of cooking.
So, give it a try to make one of your convenience foods from scratch and see how you like it. I have one in my blog: Tomato Sauce. And I will be sure to post a few more: like fresh breadcrumbs and gravy.
I do make one exception and that is homemade stock (though I do make a very abbreviated one when I make gravy, which I will share.) I have yet to do this and at this point in my life prefer to use Swanson products and on rare occasion, Herb-Ox chicken and beef broth. But that is the joy of cooking and baking: an endless supply of things to learn, create and experience!
Rice Pilaf
This is a recipe that has been in my family for a long time. There are many versions of rice pilaf out there but this one is particularly tasty. Great served with grilled chicken which is what I did the other night.
It’s a simple recipe, not too many ingredients and not too difficult. What makes it delicious is browning the rice with butter and onions. Patience is probably the most important ingredient.
Rice Pilaf
4 tablespoons of butter
1 medium onion grated or finely chopped (this can also be achieved in the Cuisinart Mini-Prep, just chop/grind a few times)
1 cup of uncooked rice (this must be Uncle Ben’s Converted Original Enriched ParBoiled Long Grain Rice. If you use medium or short grain rice it will be clumpy and will not taste the same. Tried it: yuck)
2-1/2 cups chicken broth (I make this using 3 Herb-Ox Chicken Bouillons or packets ( 1 bouillon or packet = 4 grams) and 3 cups of boiling water. Just use 2-1/2 cups of this.)
Melt butter in medium saucepan over medium low heat. Add onion and rice and cook until golden brown, stirring frequently. This could take 15 minutes and where the patience comes in. It must be watched because it will quickly burn if you don’t. Add broth and simmer (one notch hotter than low) covered for 20 minutes until liquid is absorbed.
Chicken broth and rice that are used in this recipe:

Rice, butter and onion at the beginning stages of cooking:

Rice nicely browned:

Simmering with the chicken broth & ready to cover:

The result:

Rice pilaf served with grilled chicken and asparagus:

Mushroom Shallot Sauce
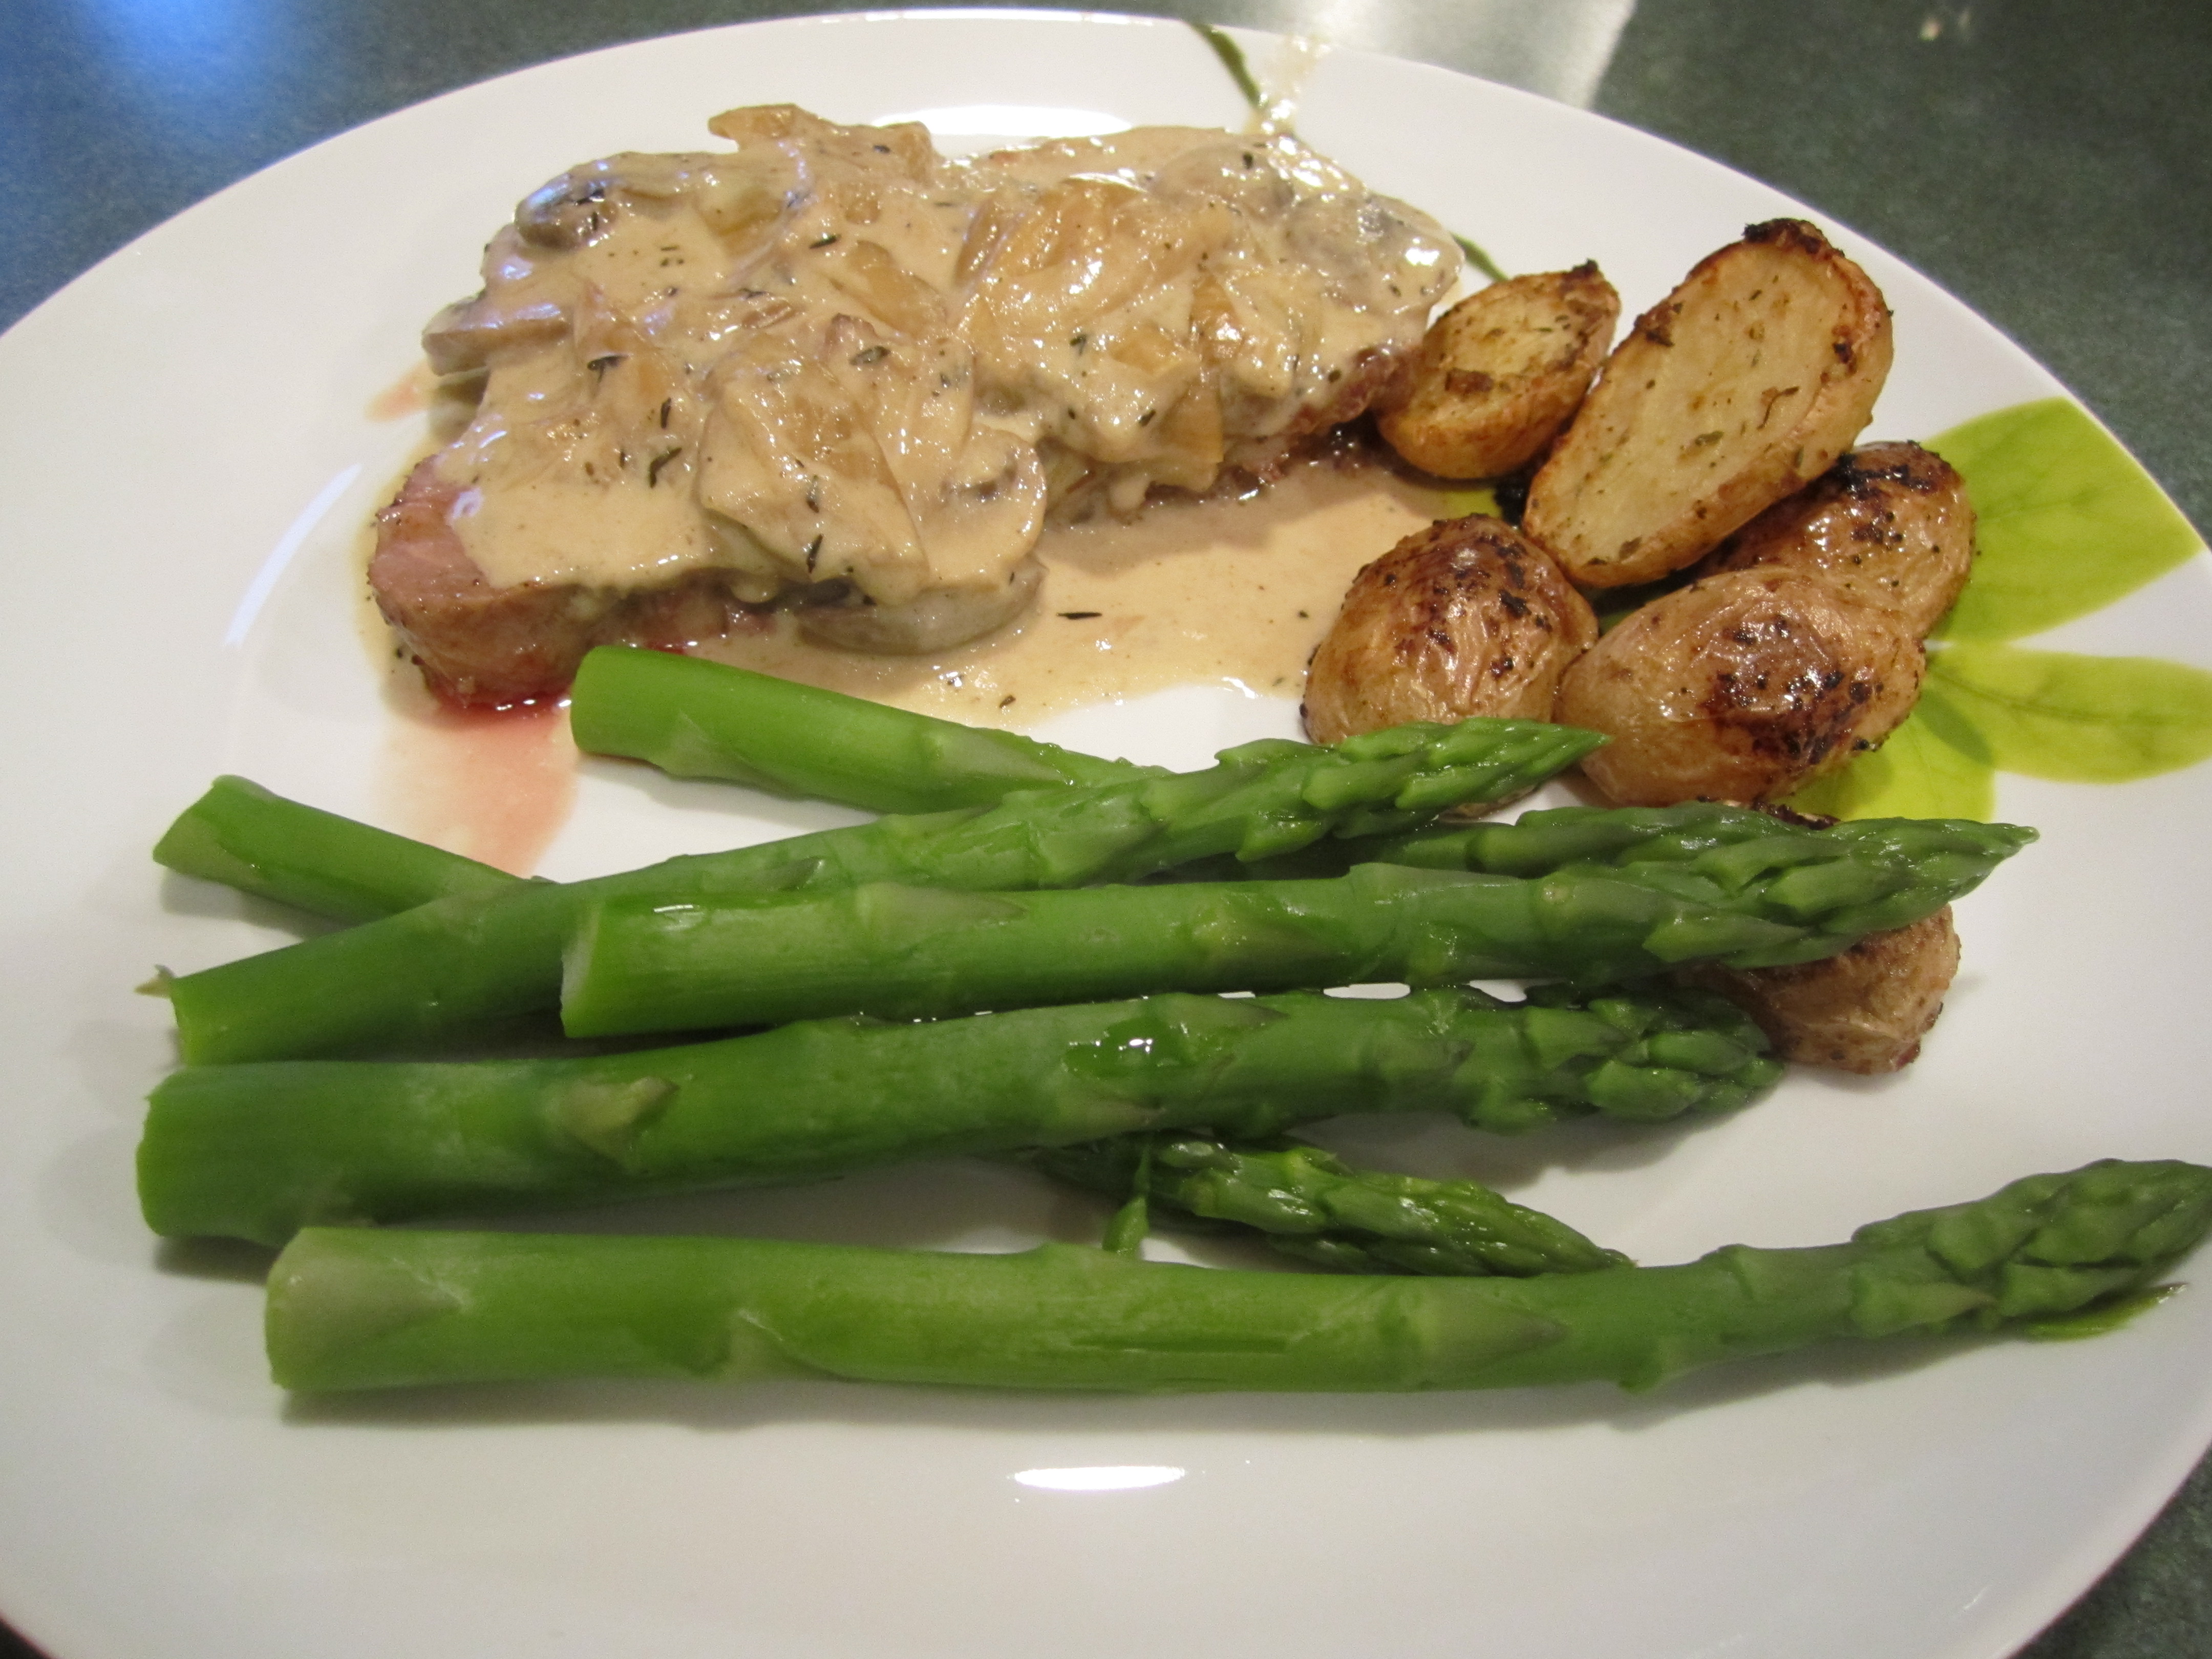
The original recipe, which I have modified quite a bit, is from Bon Appetit. It is supposed to accompany the Brown Sugar-cured Turkey. I never brought those two together but instead serve it with a roasted beef tenderloin.
I have been serving this combination since 1998 and everyone really enjoys it (even my son!). It is great for a sit down dinner party and for Christmas, Easter, Birthdays or for the first meeting of the future in-laws (go with your stand by recipes for that one! haha!). The best part is that the sauce can easily be made the day before and rewarmed very gently in the microwave the day of your big event.
Mushroom Shallot Sauce (adapted from Bon Appetit)
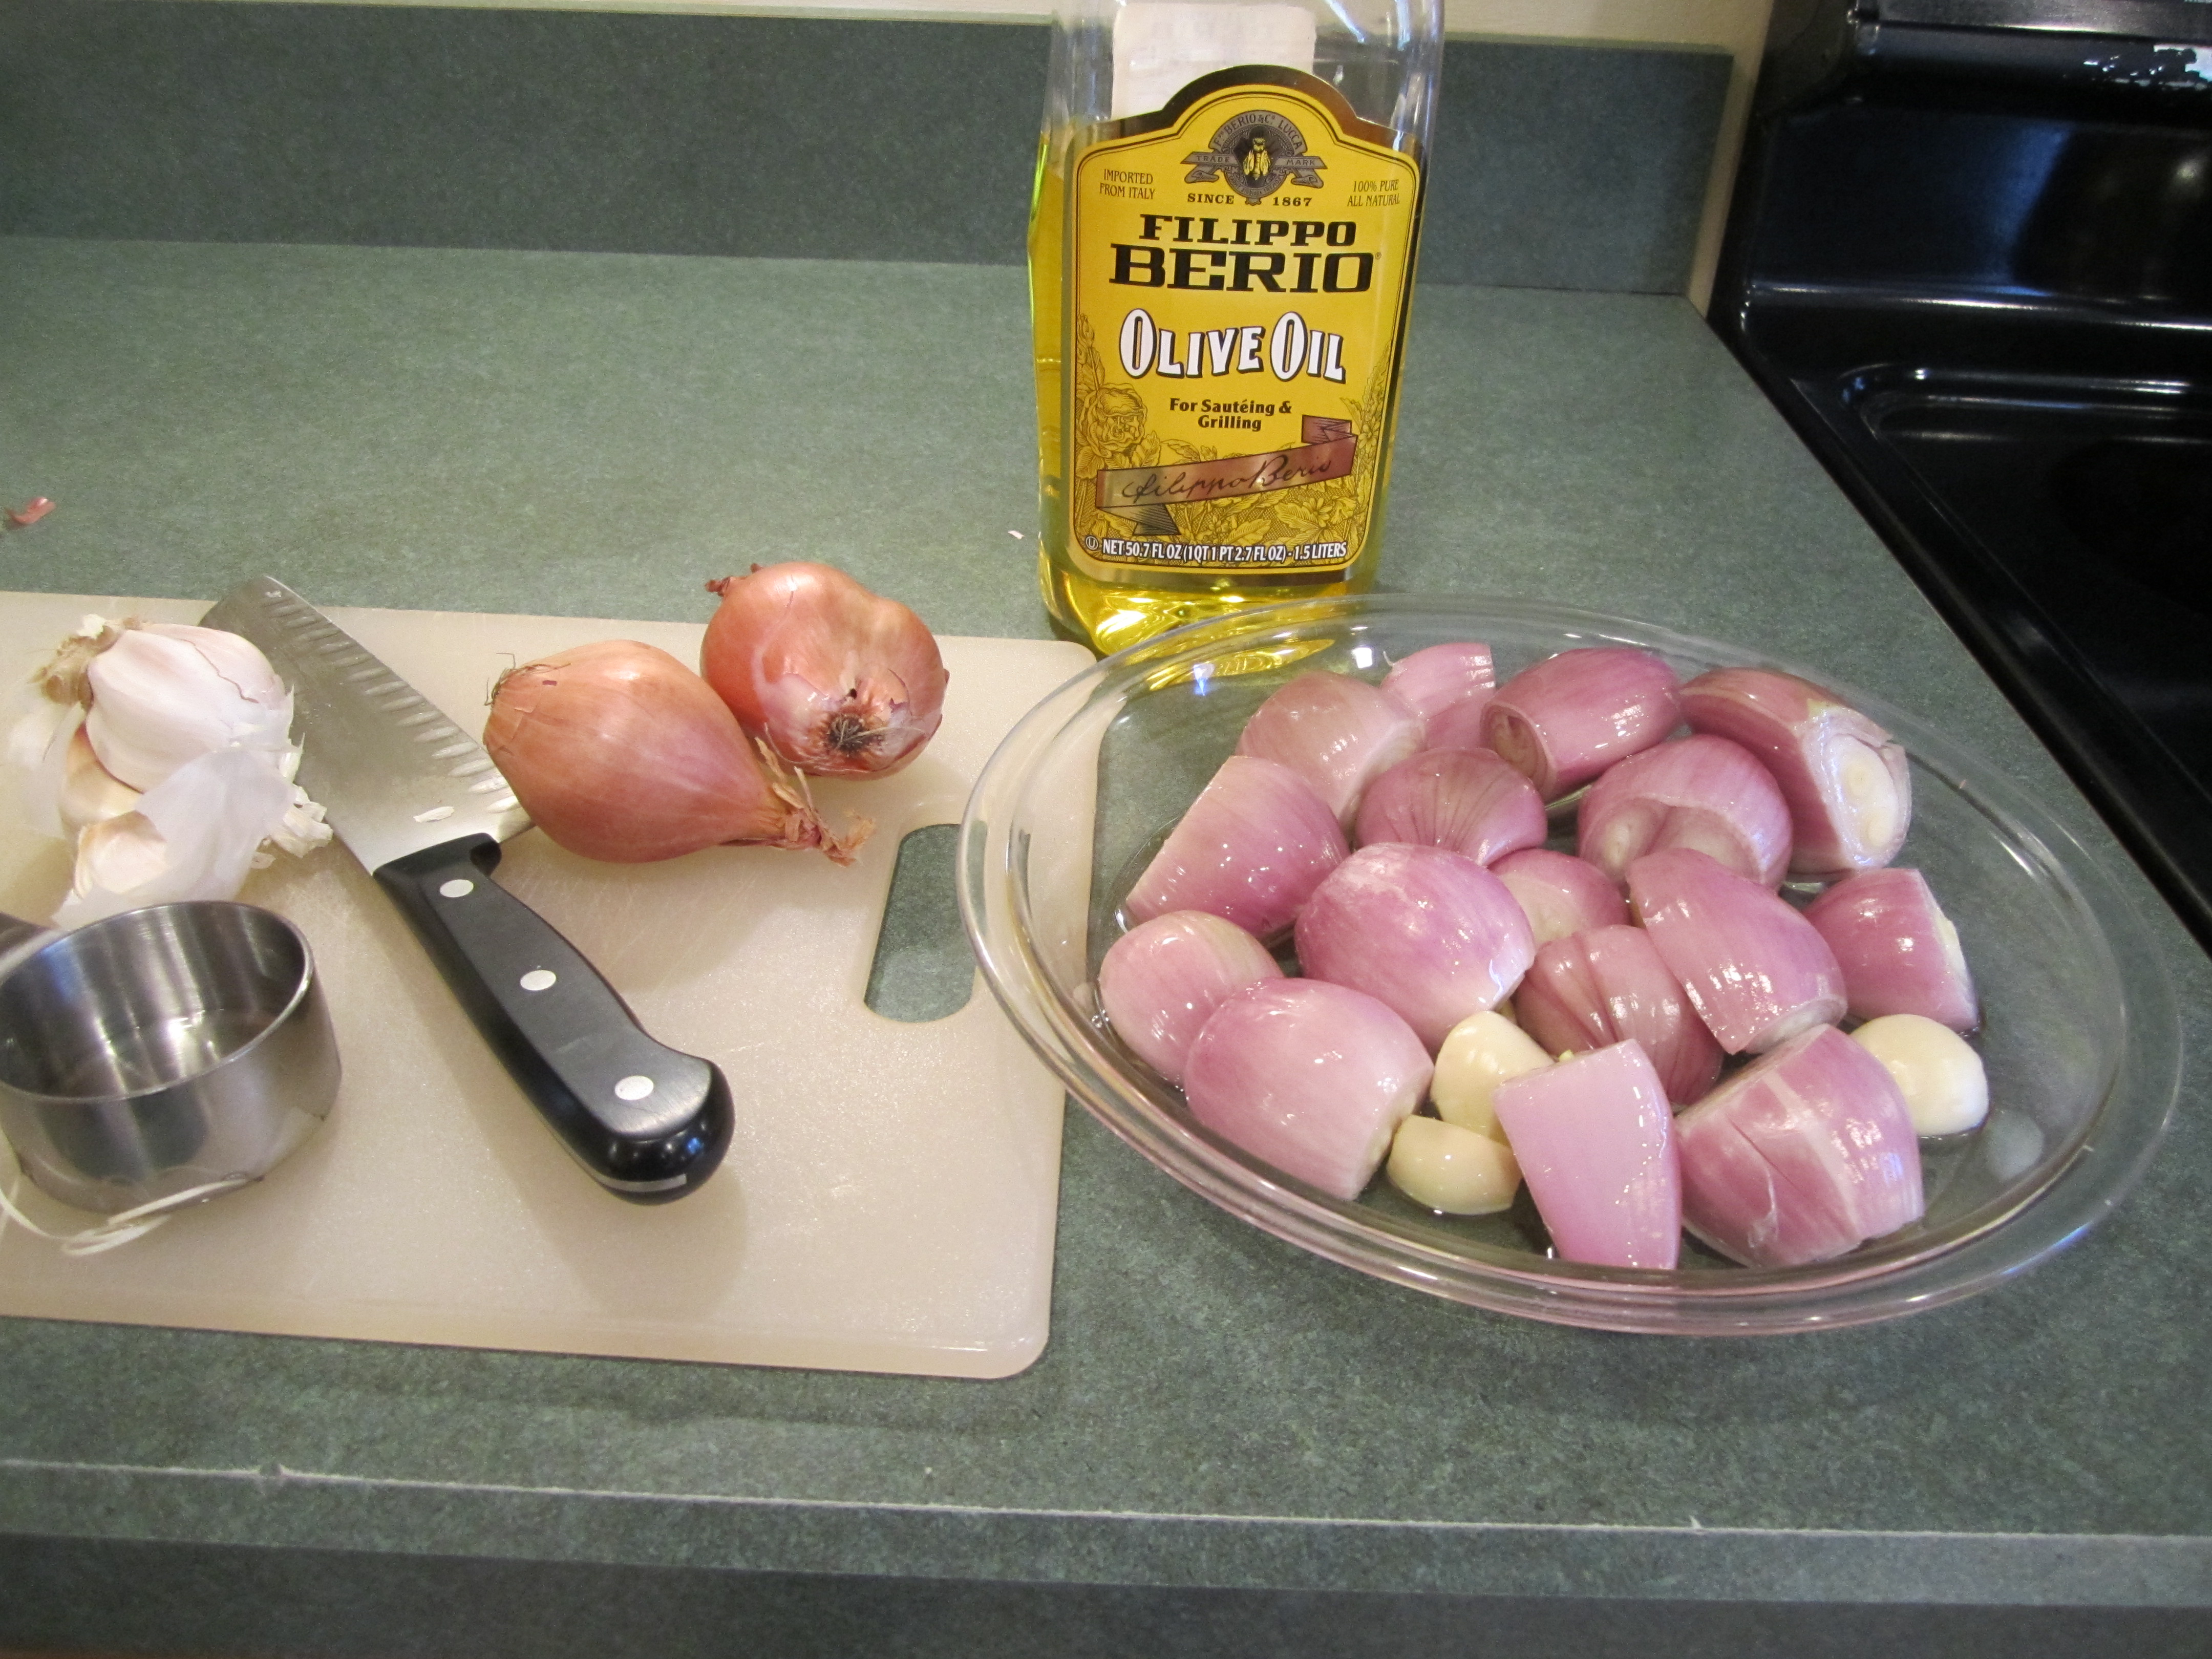
1/4 cup olive oil
10 shallots, peeled (sometimes they are so big 8 will do but when shopping get 10 and then see what fits in the dish)
4 large garlic cloves, peeled
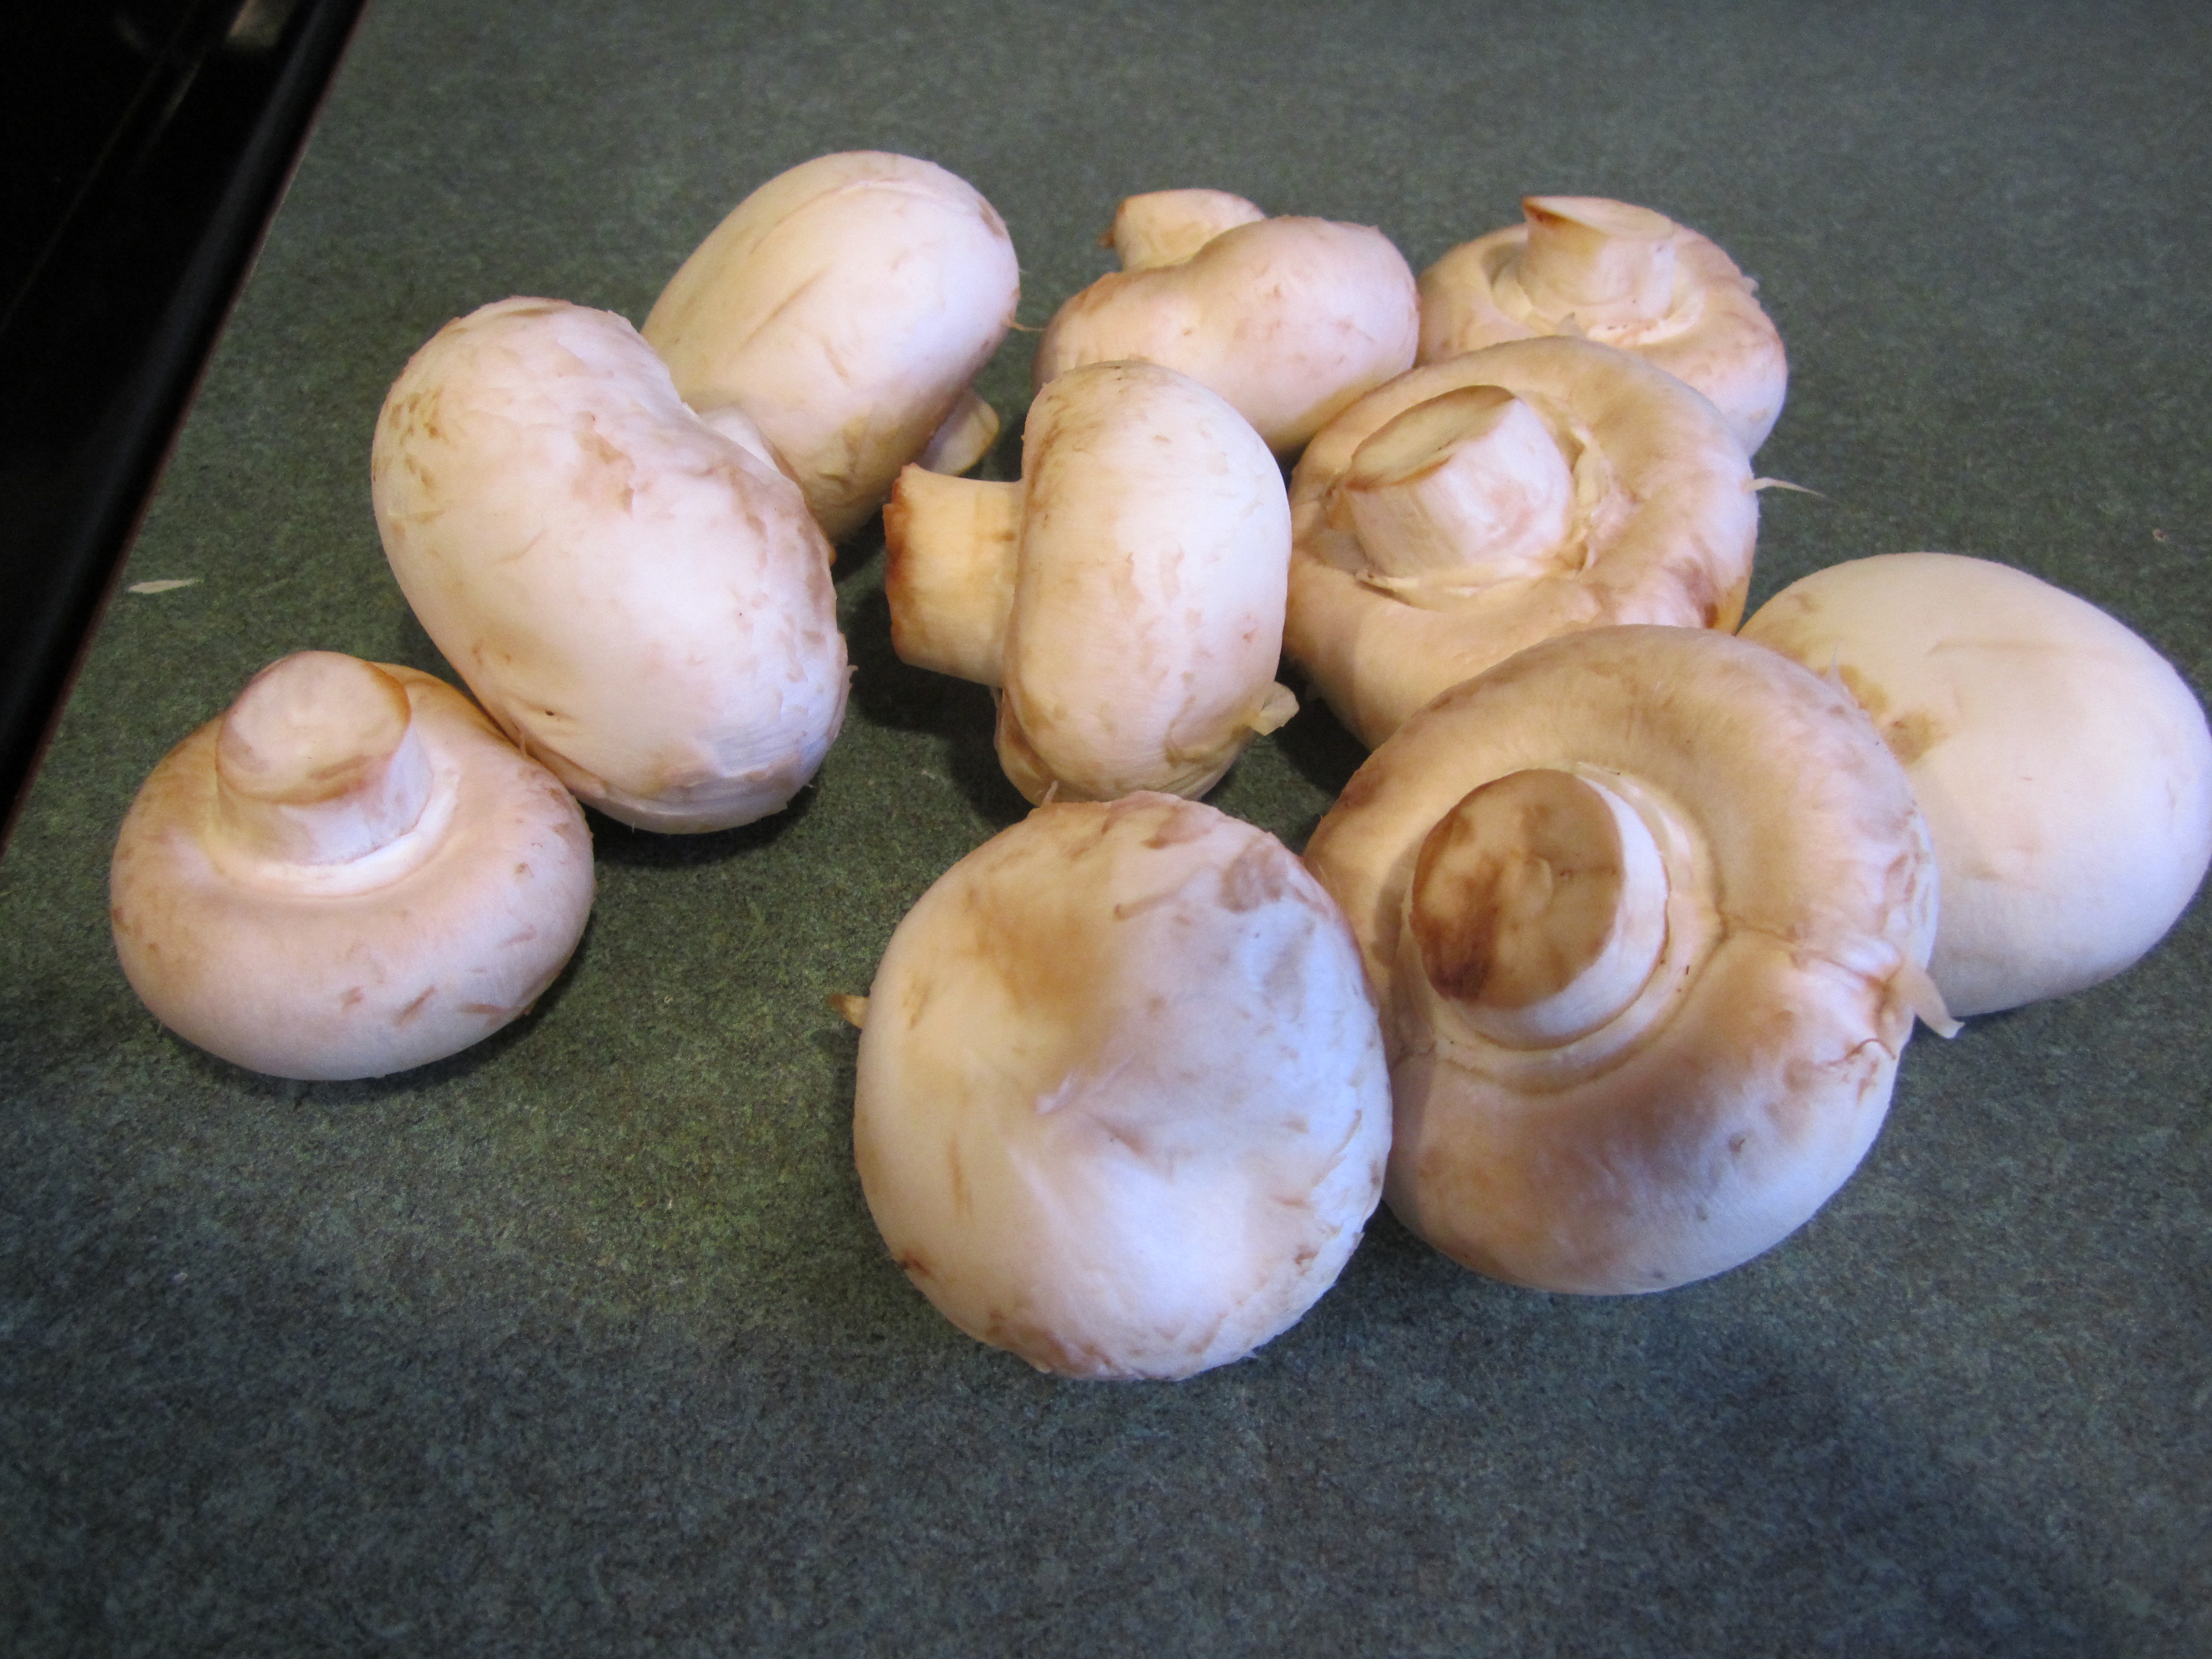
12 ounces of white mushrooms, cleaned and sliced 1/4 inch
1 teaspoon dried thyme
3/4 teaspoon dried rubbed sage
1/2 cup Sherry (The brand that you must use: Harveys Bristol Cream, original superior, in the blue bottle)
1-1/2 cups low salt chicken broth
1 cup heavy cream
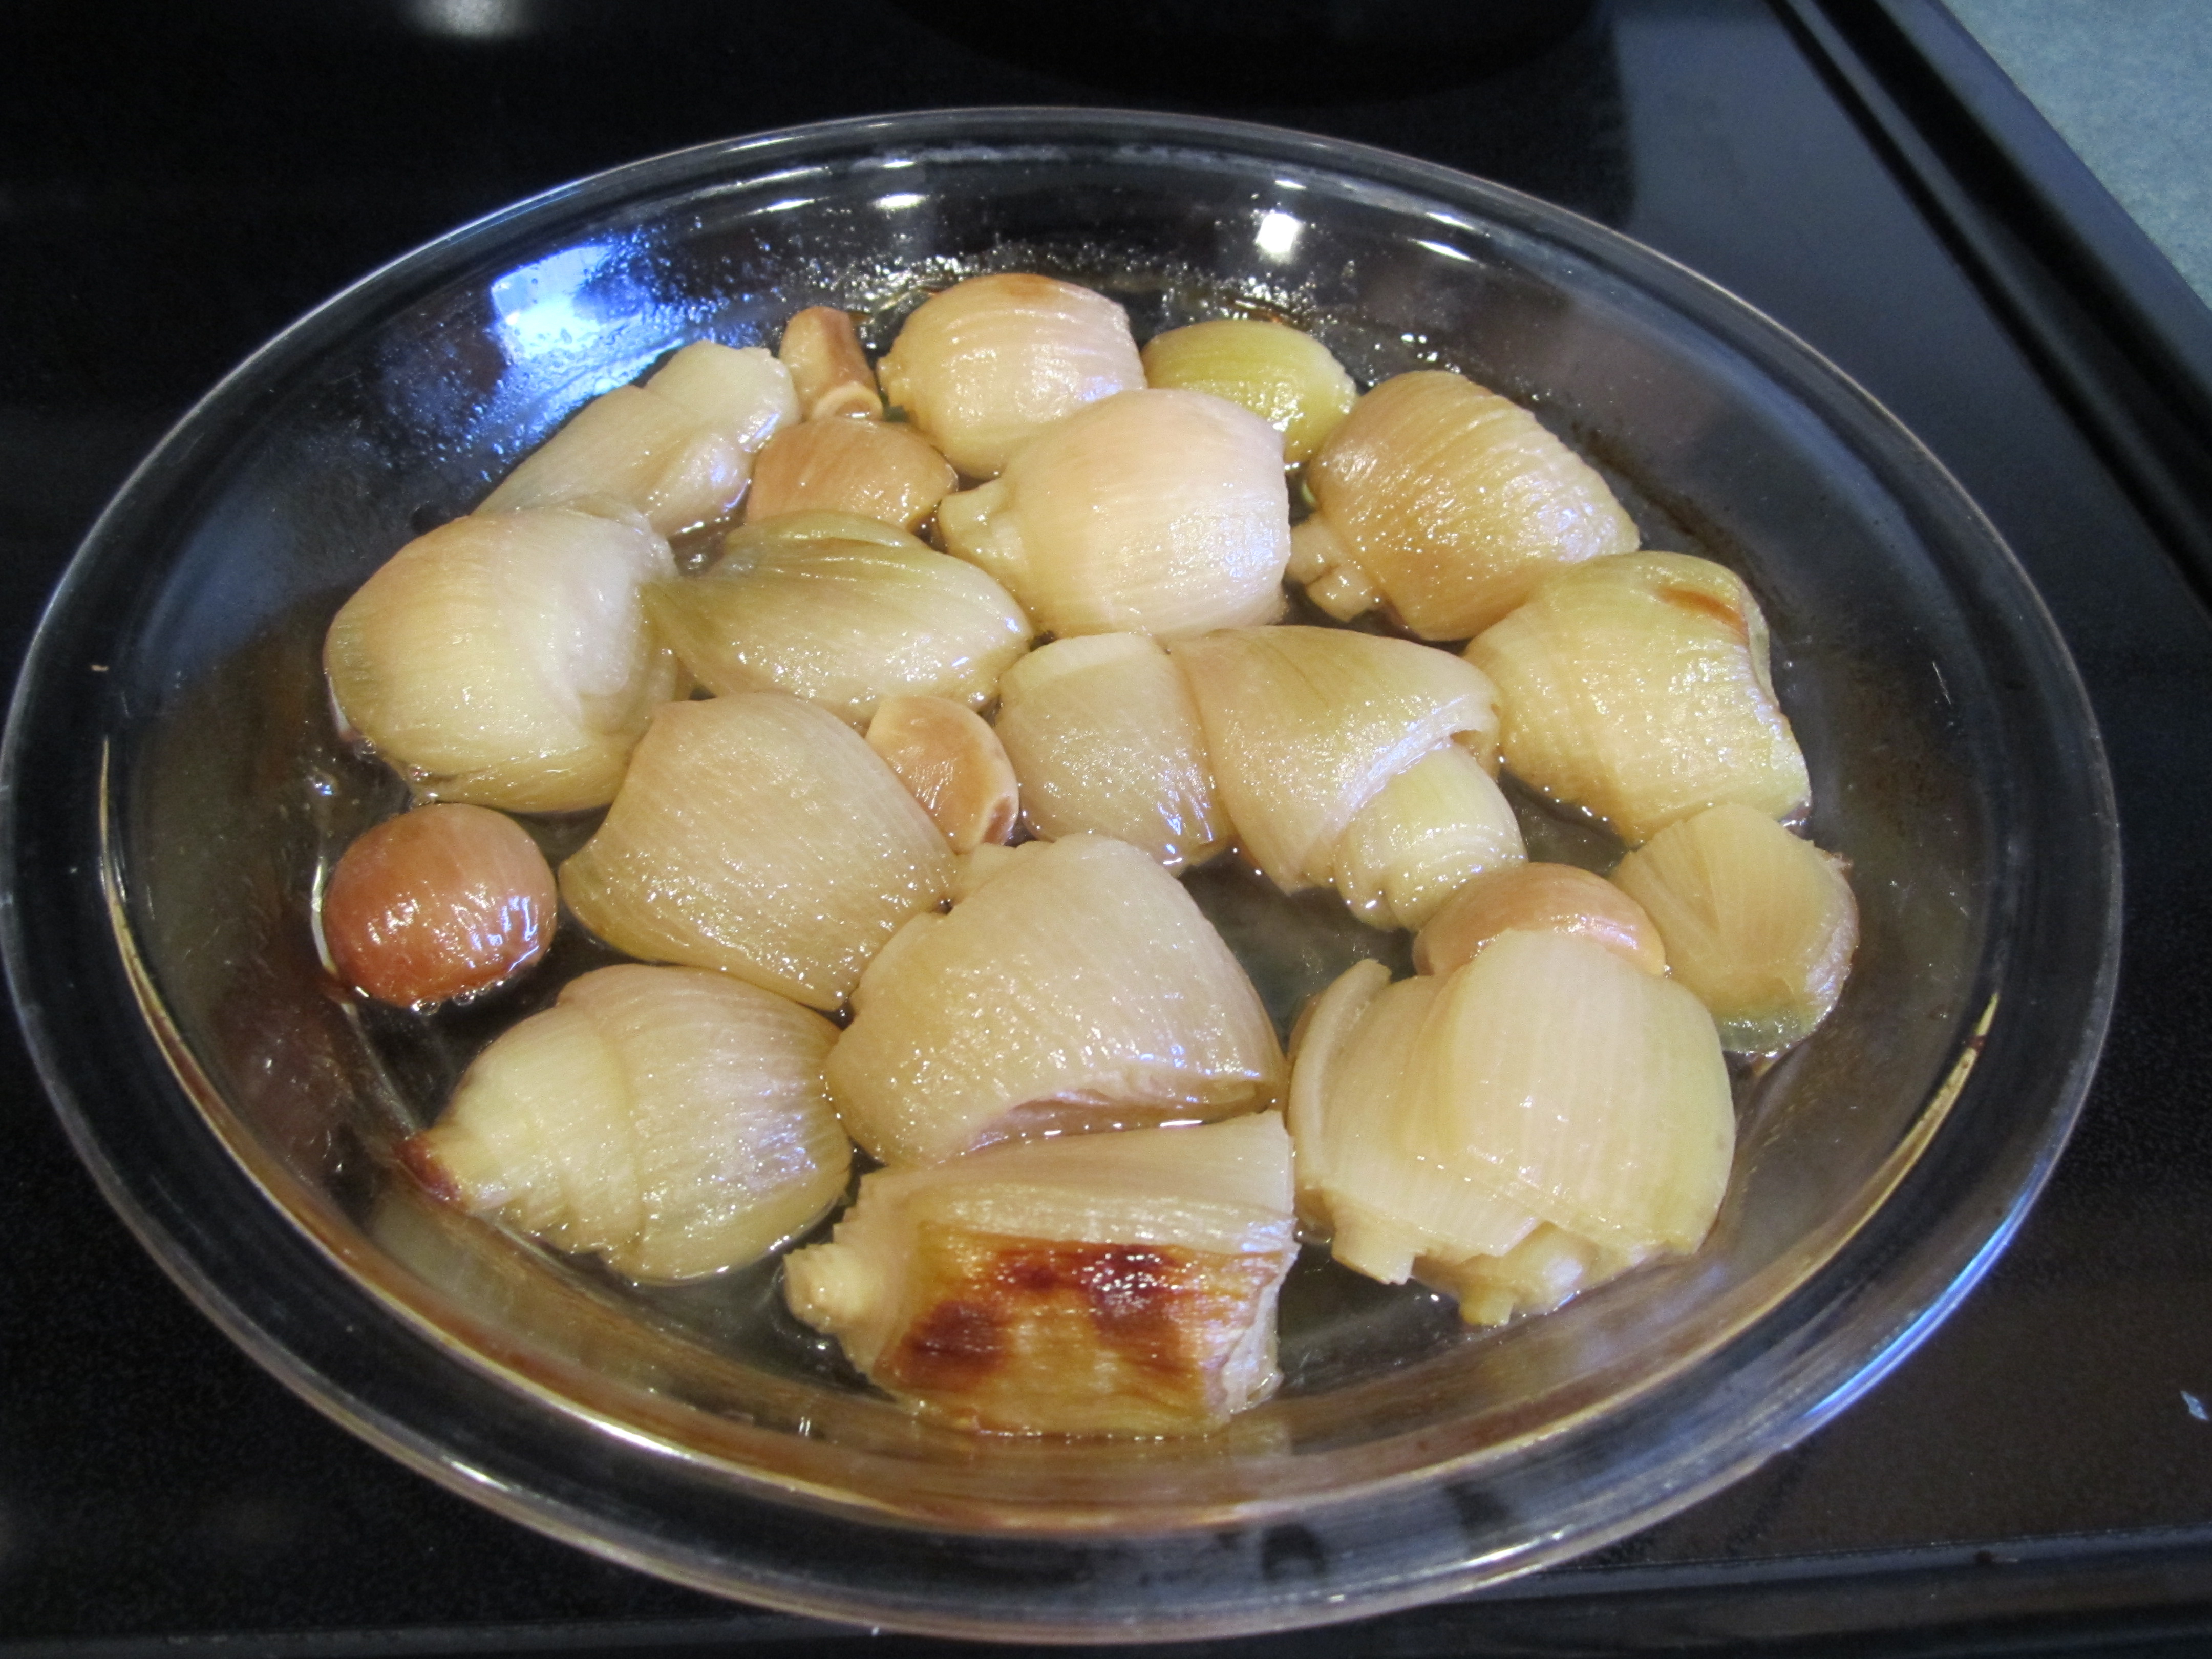
Preheat oven to 300 degrees. Put shallots and garlic in a glass pie dish and pour on olive oil. Cover dish with aluminum foil and bake for about 1 to 1-1/2 hours until shallots and garlic are very tender and pale golden. (the smell of this alone is intoxicating!)
Transfer shallots and garlic including oil, into large saucepan. The temperature on the dial of your stove burner should be between medium and high. Add mushrooms, thyme and sage. Saute until mushrooms are tender ~14 minutes. Keep the temperature the same, between medium and high, add Sherry and boil until syrupy about 3 minutes . Add chicken broth and boil for 10 minutes. Add cream and boil for 5 minutes. Watch carefully through out the whole procedure, stirring. The sauce is very thick. Serve with roasted beef tenderloin (makes about 3 cups).
Garlic, shallots with oil ready to go in the oven (I could not squeeze the other 2 shallots in, they were very big):
Garlic, shallots finished roasting:
White mushrooms cleaned and dried, ready to be sliced (these were a bit on the big size too but all that Shoprite had. Smaller white mushrooms are fine too)
All ready to saute, with the next ingredients to be added:

Mushrooms cooking waiting for additional ingredients:
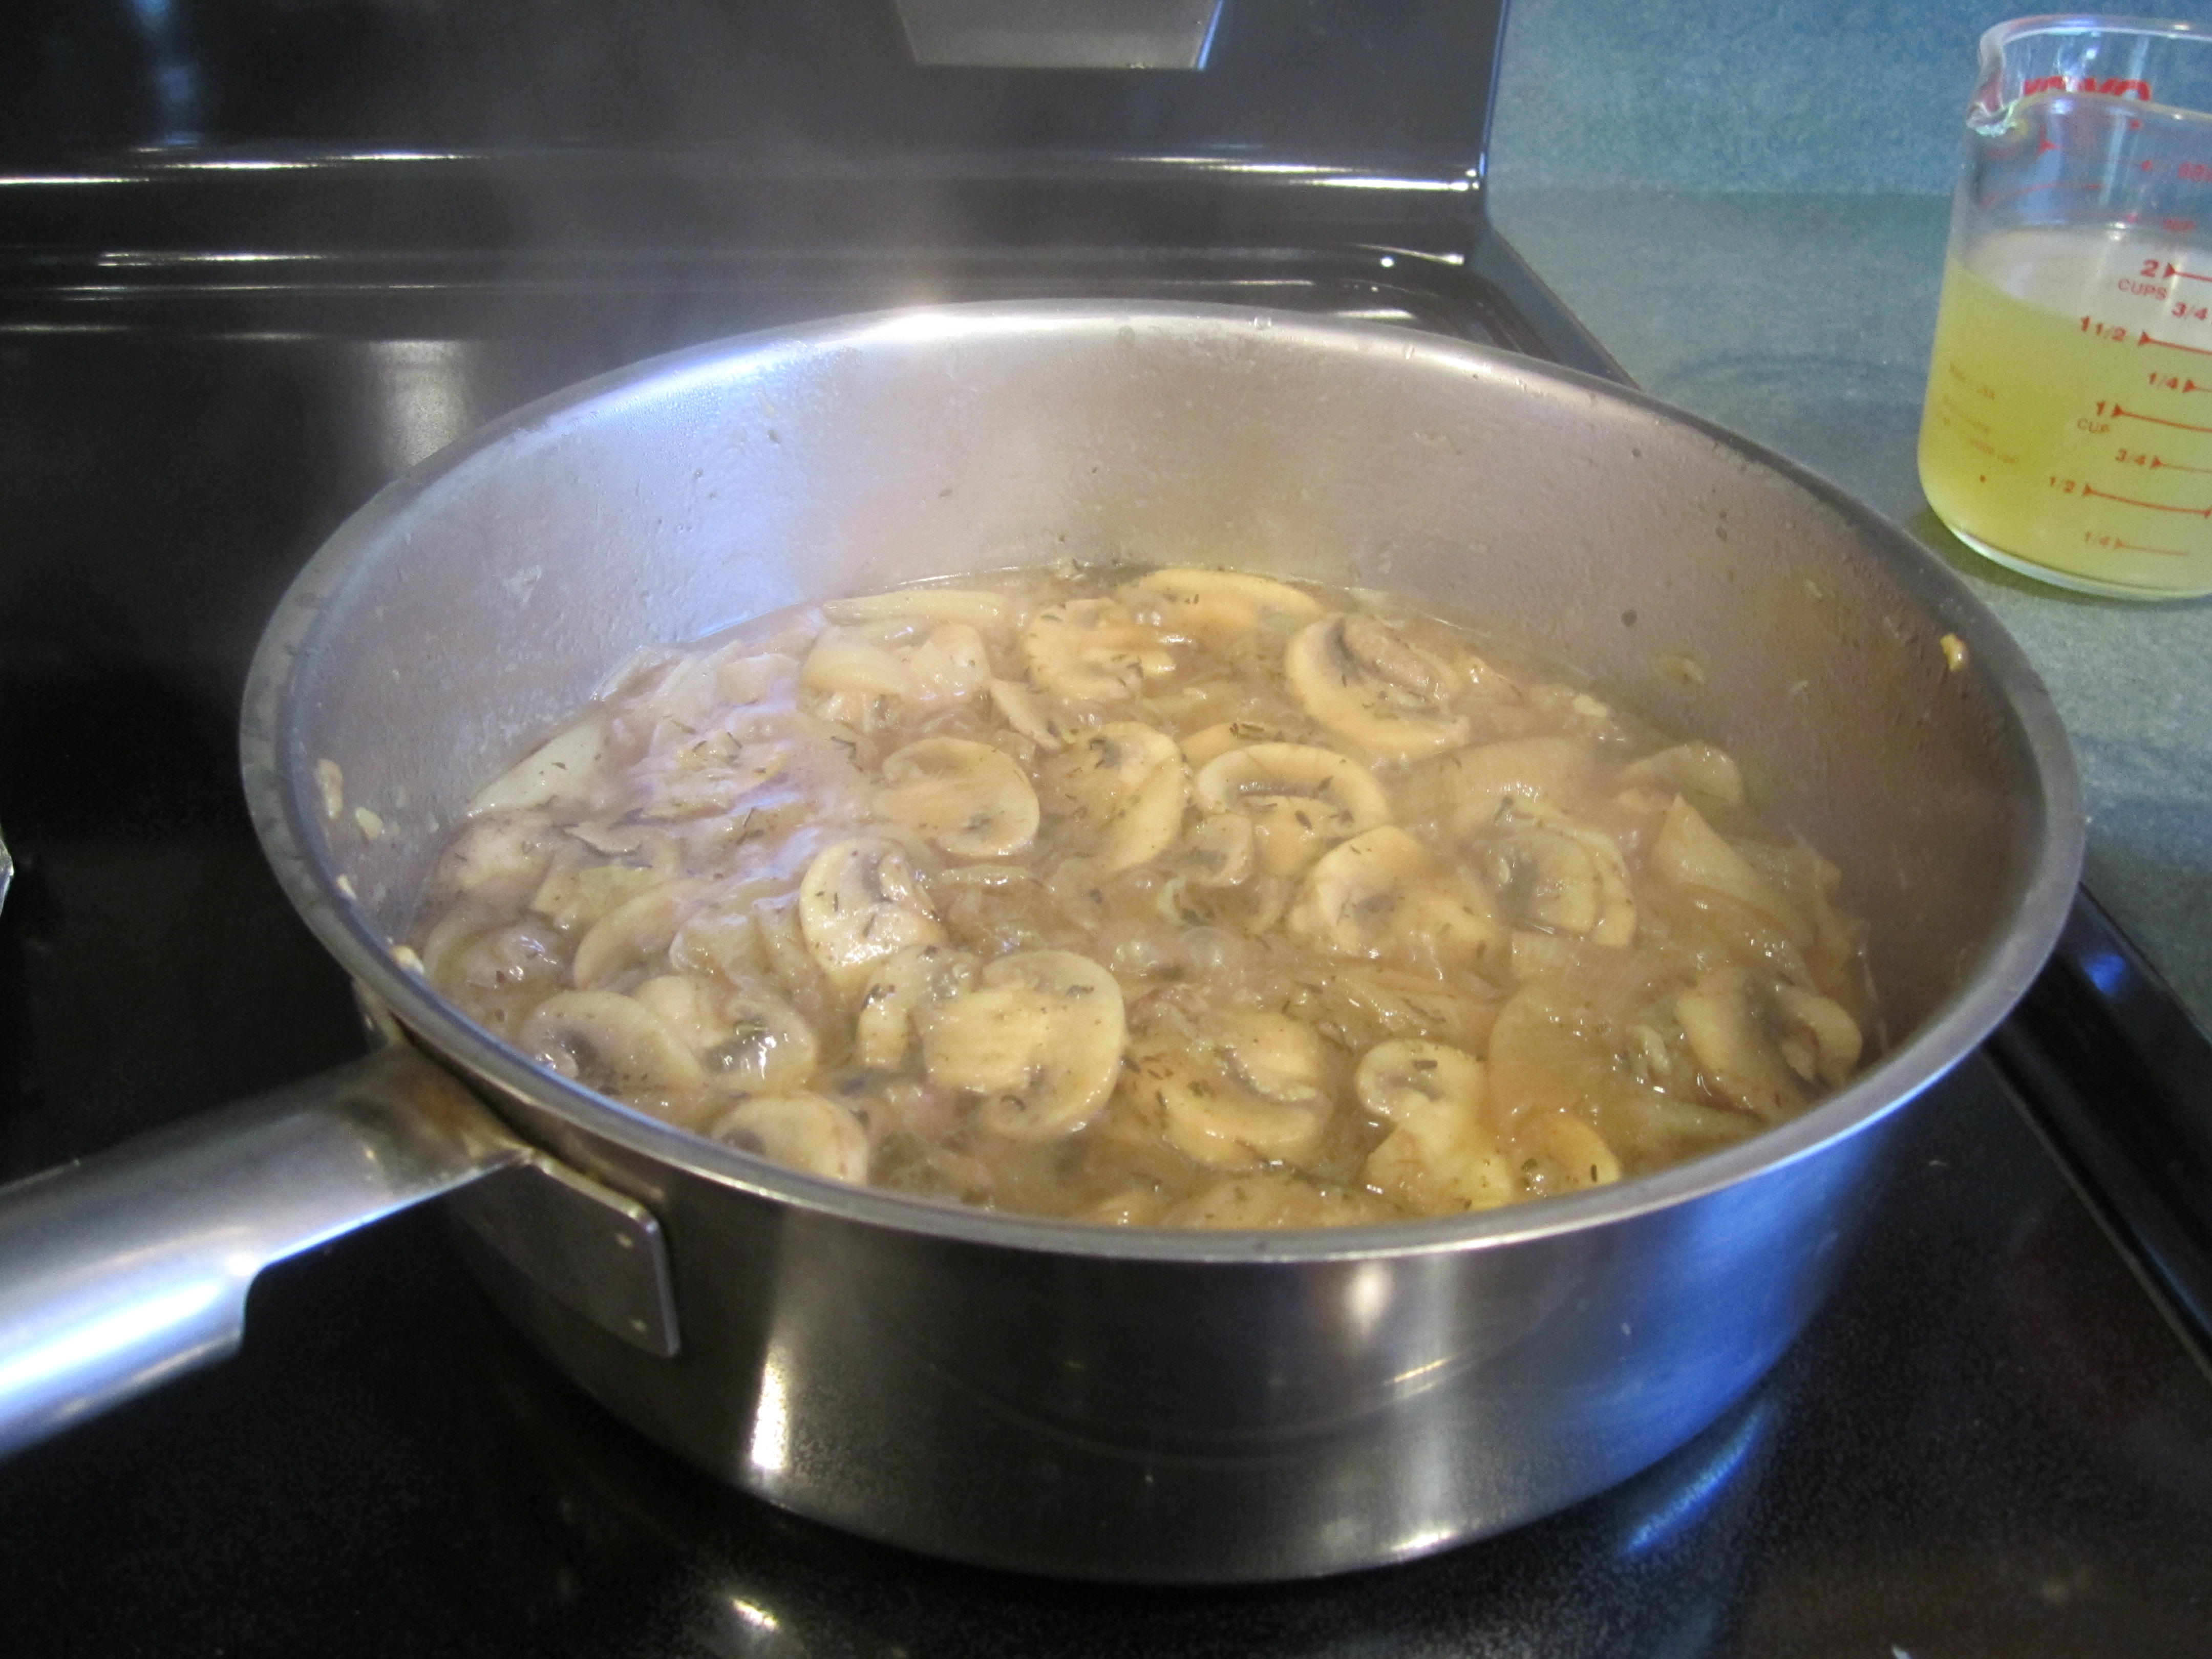
All finished:
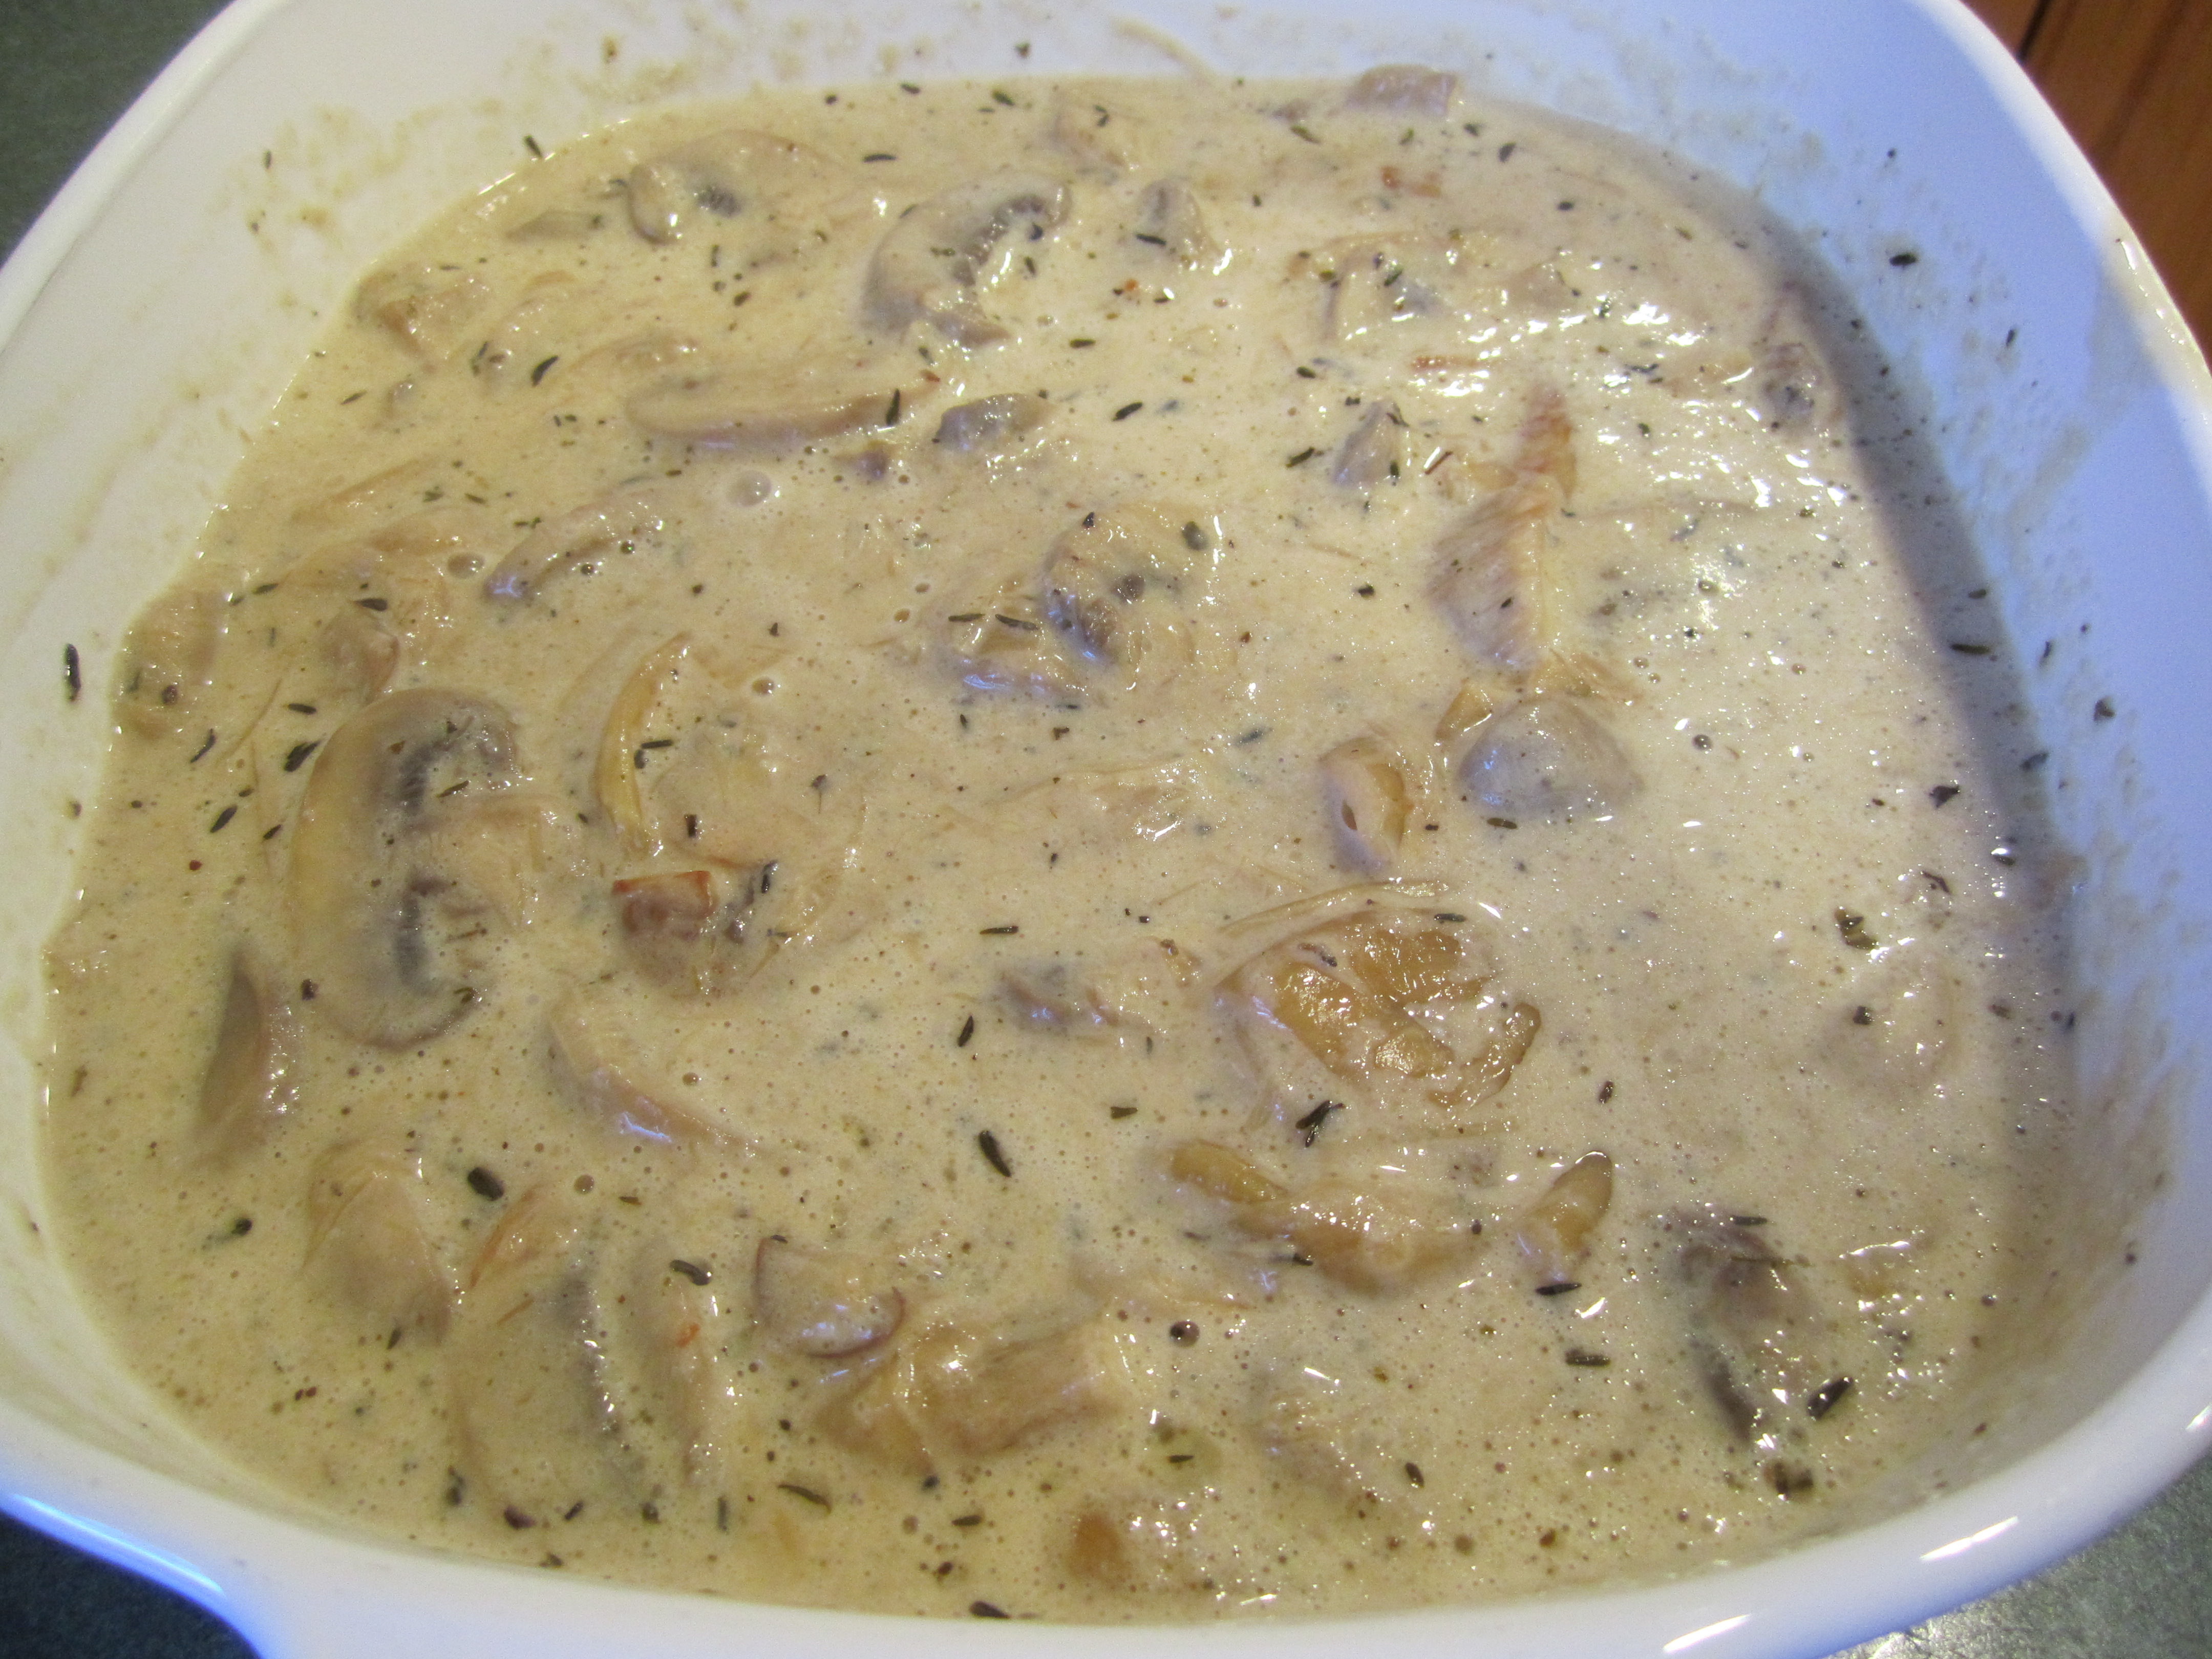
Ready to eat! mmmm:

Pecan Tassies
We were going to a party and were asked to bring a finger food to share. Of course I wanted to bring a dessert.
Cookies seemed like the logical choice but I didn’t want to bring just cookies, I wanted to bring something a bit more. So, I went through my ‘cookbooks’ and decided that the dessert section would be a good start. I picked out a few possibilities but then I thought of the Pecan Tassies. The recipe was given to me by my older sister who made them frequently for gifts and when they had company. Perfect. Now I had to figure out where they were in my cookbooks because they weren’t in the dessert or pie sections.
I finally found them in with the cookies, under ‘other’. Not sure whether that was the proper filing but there they were! They were in between two other ‘lost recipes’ that I had made long ago: Date Filled Cookies and Hahas (an Armenian cookie), so much to share! Anyway, back to Pecan Tassies. They seemed perfect, so I ventured to give them a try.
Pecan Tassies
1, 3 ounce package cream cheese
1/2 cup butter
1 cup flour
1 egg
3/4 cup brown sugar
1 tablespoon of soft butter
1 teaspoon vanilla
2/3 cup finely chopped pecans
Cheese Pastry: put butter and cream cheese in a mixer and mix together until creamy. Add flour slowly until thoroughly combined. It will seem kind of craggy but that’s ok. Put in a glass bowl, cover with plastic wrap and keep in refrigerator until finished with the filling.
Preheat oven to 325 degrees.
Pecan Filling: combine egg, brown sugar, butter, vanilla and beat with mixer until very smooth. Fold in finely chopped pecans (I took chopped pecans and chopped them a bit more in the mini- prep).
Take out pastry and shape small 1/2 ounce pieces into ~ one inch balls. Shape all the pastry into balls to make sure that you use all the pastry evenly. Place balls into a Mini Muffin Pan (this is what I bought at Kohl’s. Anything similar is fine) and press balls into each mini cup.
Place a little more than one teaspoon of filling into each cup. Bake for 20 minutes until golden brown and the filling is slightly puffy.
Cream Cheese Pastry:

Filling:

Rolling pastry into balls and pressing into cups:

All filled and ready to go in the oven:

Just out of the oven (hmm, one is missing!):

Yum! Turned out to be a big hit with my husband and son. Hope it works at the Party!


p.s. They were a success!
My Mom’s Coleslaw
My mother made the best Coleslaw. When she was still with us, I very rarely made Coleslaw because she made it so good. I just waited for a dinner occasion that required Coleslaw, invited my Mom and promptly asked her to bring the Coleslaw. Simple.
It’s not that I didn’t have the recipe. I did. And on rare occasions I would make it. I just preferred it when my Mom made it.
Maybe a month or two after my Mom passed, I decided I needed the Coleslaw. When I made it before, on those few occasions, I would grate the cabbage on this very risky slicer and mince the onion on a grater. Not fun. But when I made it this time, I remembered my mother had always used the Cuisinart. Then, it was like my Mom was speaking to me through this recipe, I kid you not, she told me exactly how to use the Cuisinart and how to make the whole process a cinch!
My Mom’s Coleslaw
1, small to medium size green cabbage (If you have access to a Farmer’s Market, get the cabbage from there, it makes a huge difference)
1, 2 x 2 inch chunk of onion (if no Cuisinart, this is 1 tablespoon of minced onion)
1/2 cup of Hellman’s Mayonnaise (my favorite)
3/4 teaspoon salt
1/3 cup of sugar
1 tablespoon of cider vinegar
1 tablespoon of milk (2% or whole)
Cut up cabbage into eighths. Cut out core from each wedge. Using the Cuisinart 2 mm slicer, shred the cabbage. Remove any really large pieces and measure out ~ 4 -5 cups. Place cabbage in a large bowl.
Clean out Cuisinart with your hands of any excess cabbage. Replace slicer with chopping/mixing blade. Put in Cuisinart bowl, the onion, mayonnaise, salt, sugar, cider vinegar and milk. Process until smooth.
Pour dressing over cabbage and with a large serving fork, gently toss the cabbage with the dressing. Place in a glass dish, cover and refrigerate. I find it best not to make it more than a couple of hours before serving. This way the cabbage stays crunchy. But this is a personal preference.
Always, always taste your coleslaw before you put it in the refrigerator. I made it one day and almost, just almost put it away before tasting. But I could hear my mother speaking to me in my head, “Taste the coleslaw, Sue!” So I did and you will not believe this but I had mistakenly put 1/3 cup of salt instead of sugar. Yikes, it was awful!!! My salt container had been on the shelf with the sugar (I usually always store them on separate shelving) and I inadvertently reached for the salt instead of the sugar! Needless to say, I dumped the whole thing out (that much salt would certainly make you pucker!) and went out to Shoprite for another cabbage. Learn, learn, learn from my mistakes! haha!
The cabbage, ready to cut:

Cabbage wedge ready to be shredded:

Shredded cabbage:

Mis en place:

Dressing, smooth and creamy:

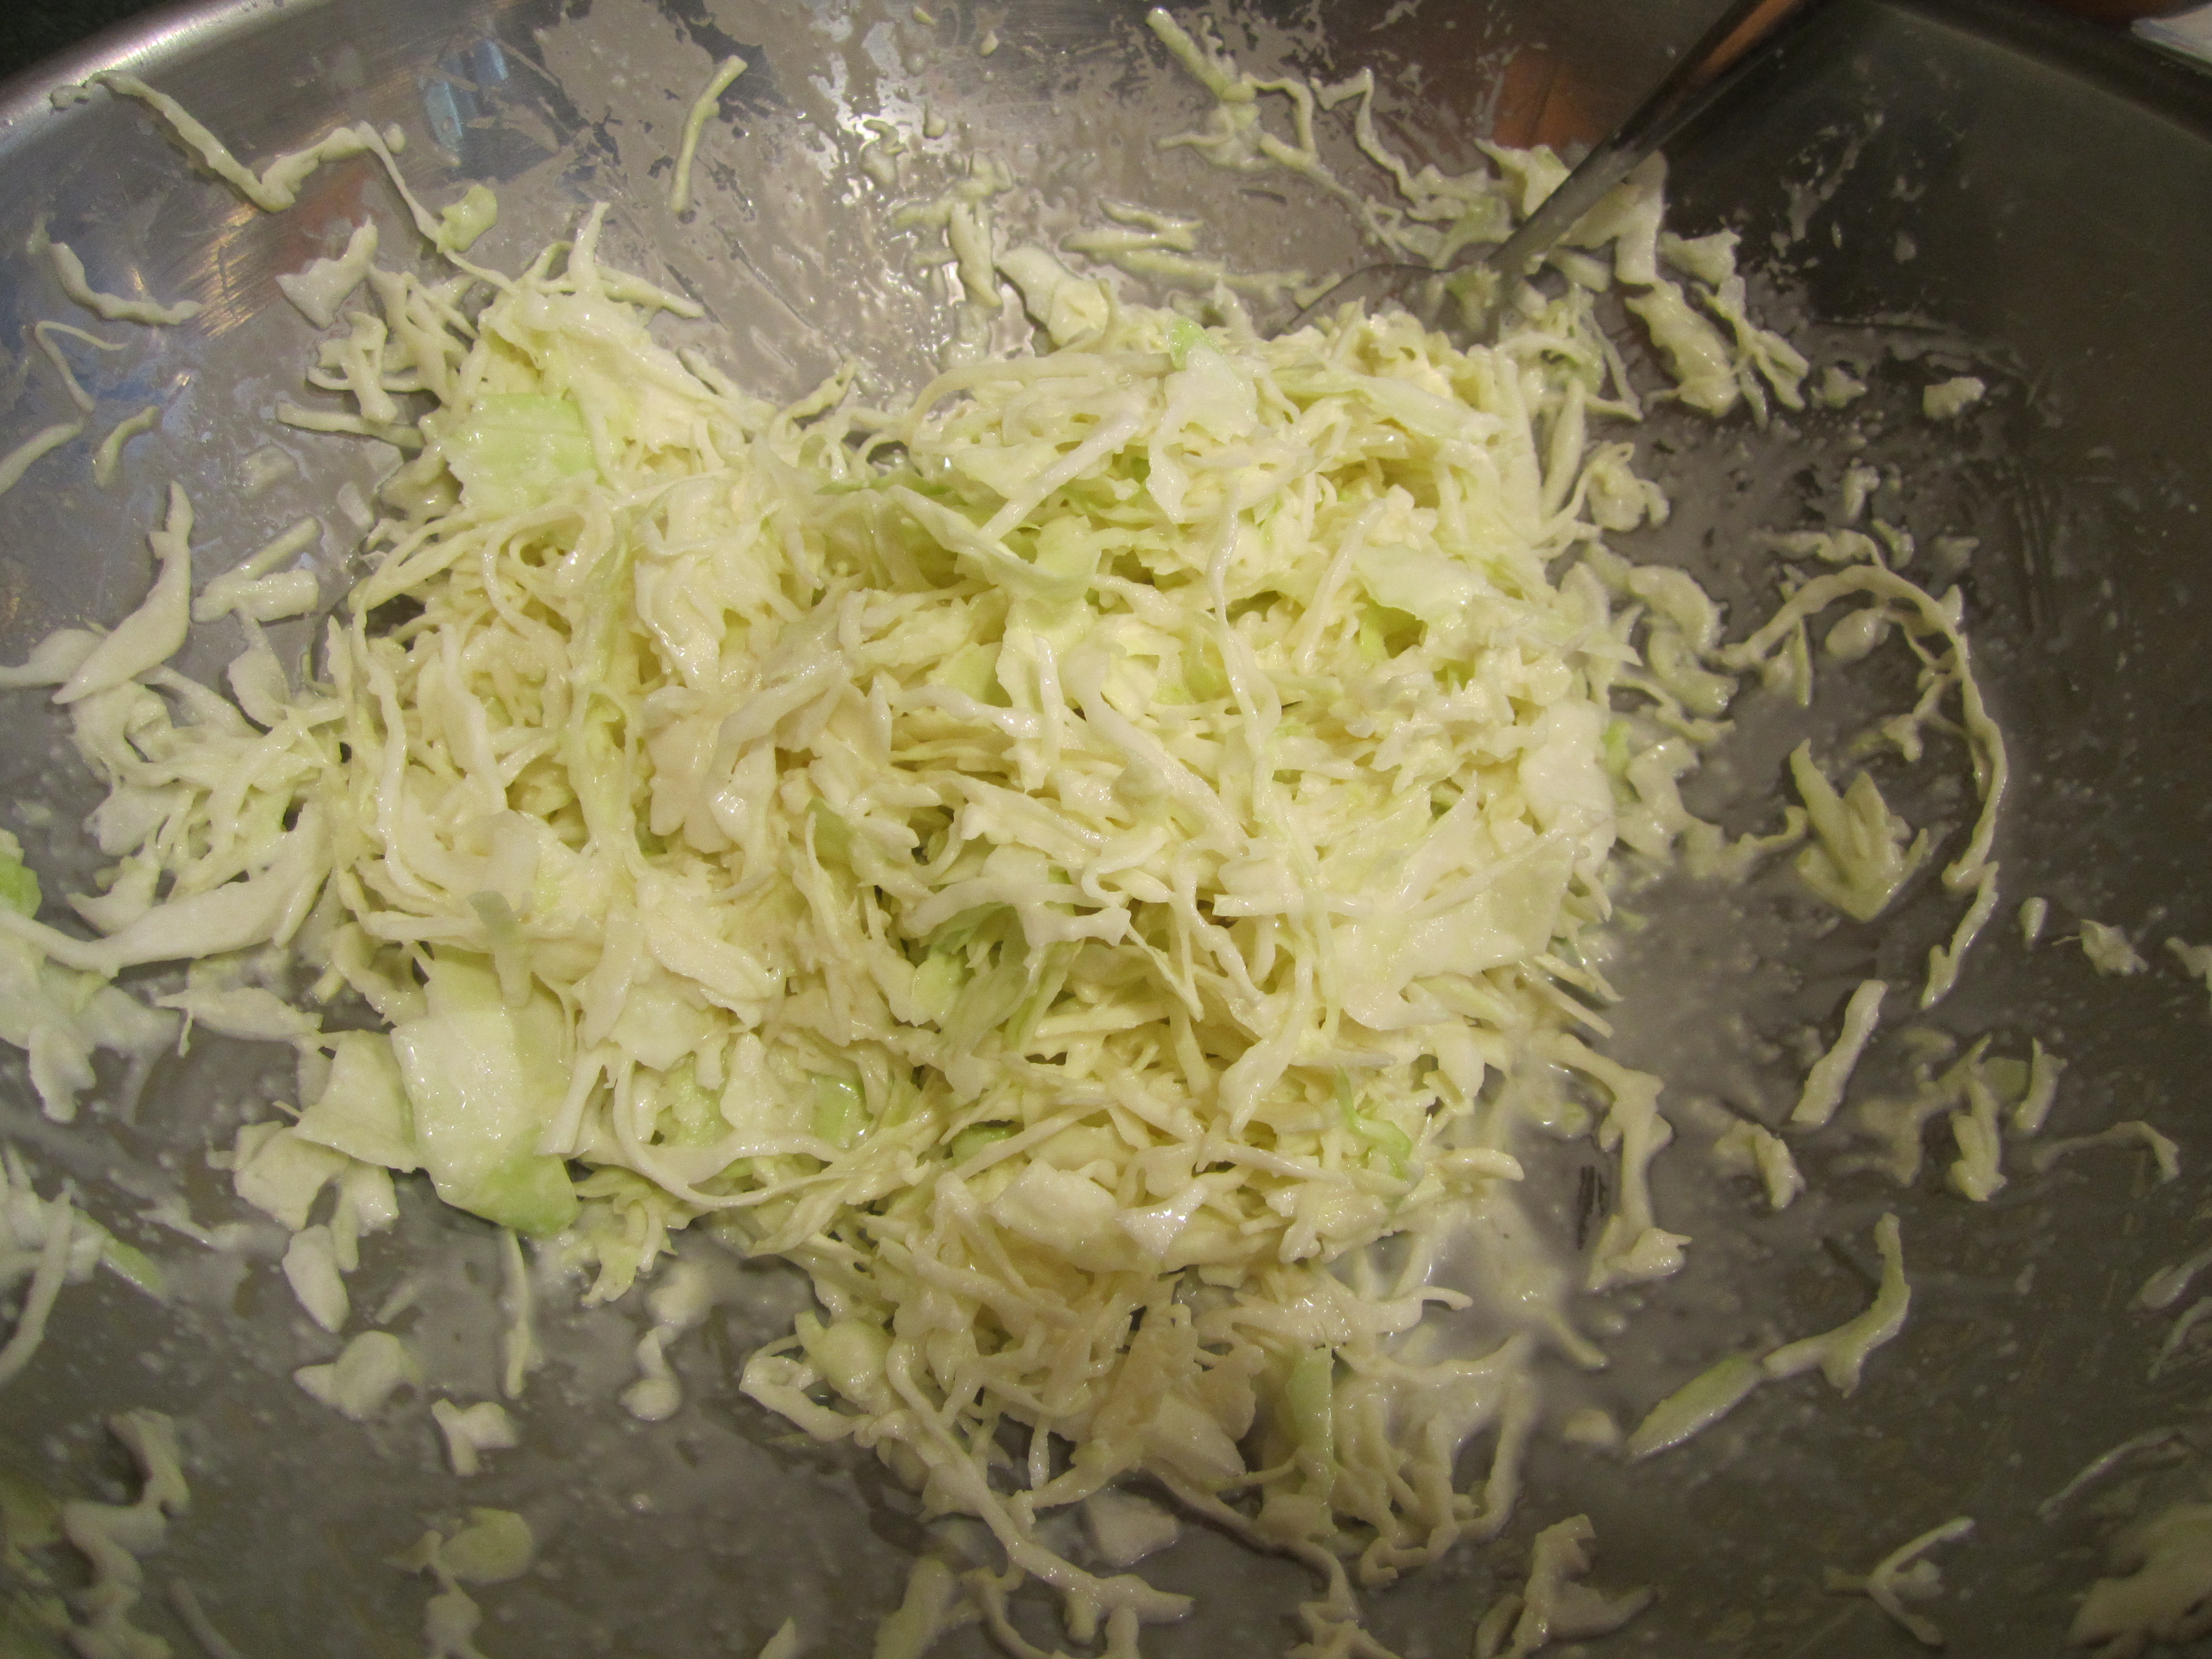
Shredded cabbage mixed with dressing:
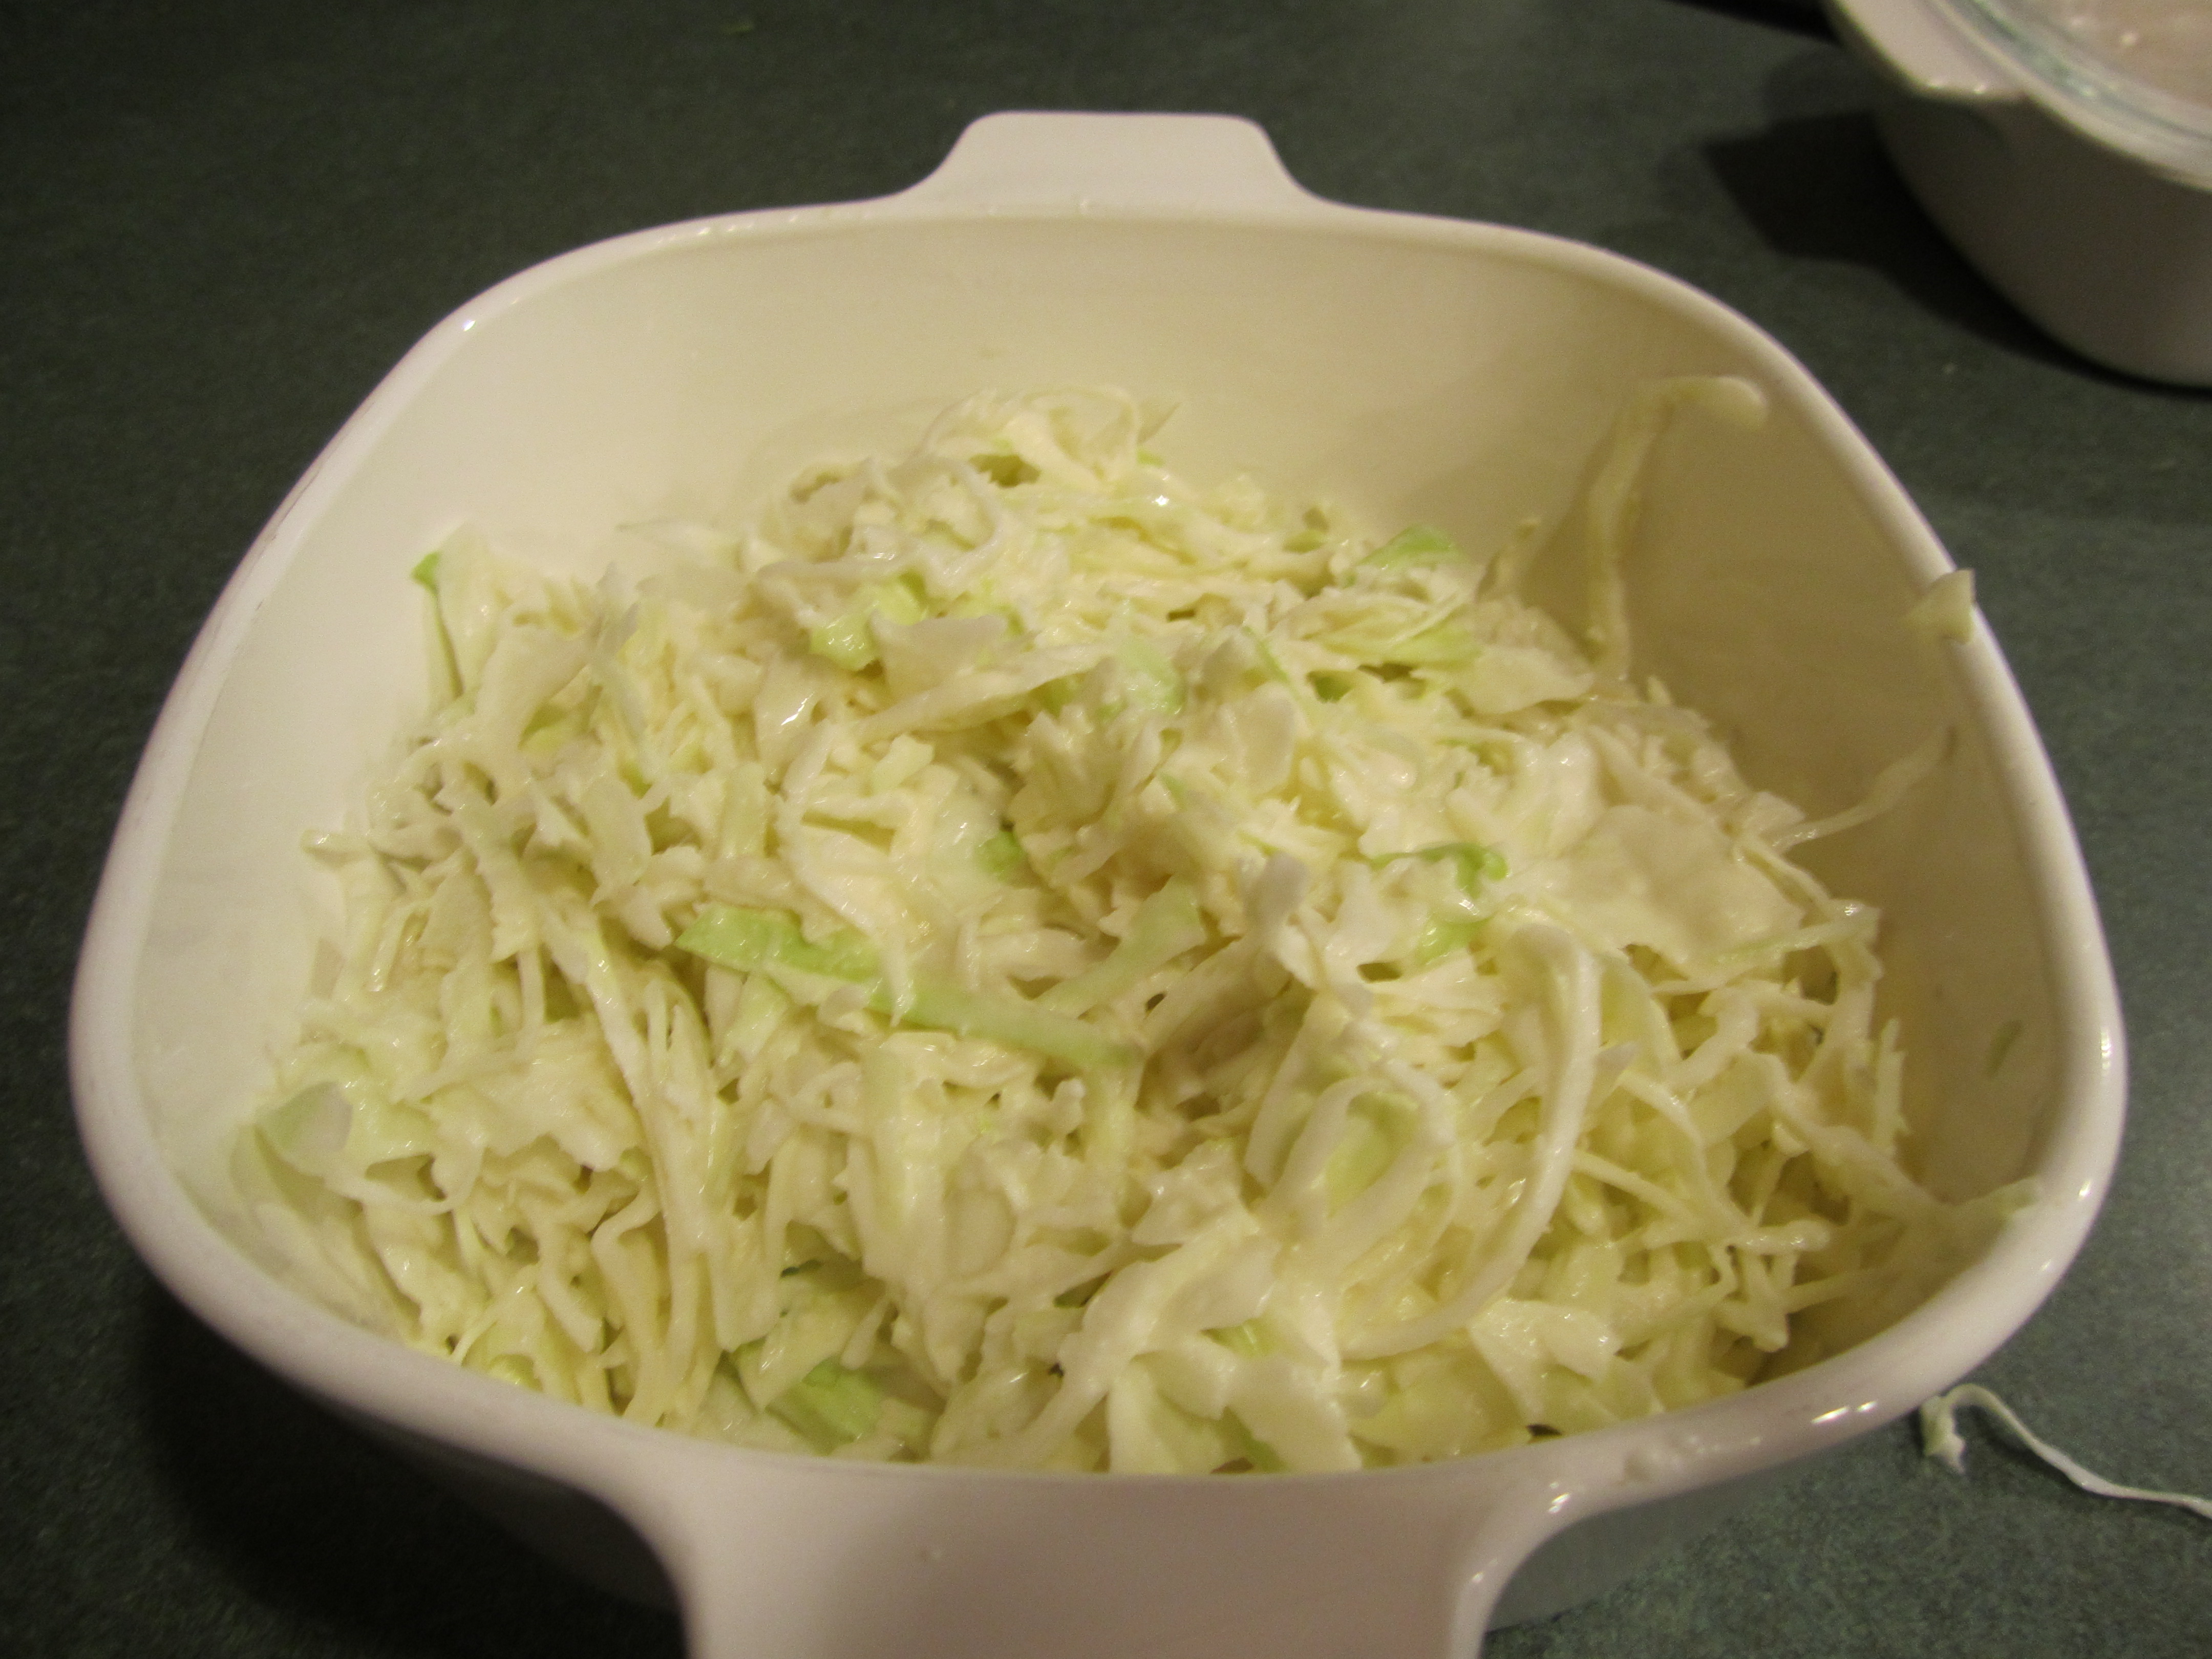
Coleslaw, ready to go into the refrigerator, to meld flavors for a bit:
Just a side note: right after I made this batch of coleslaw I noticed that my Cuisinart was leaking, yikes. I started cleaning it and noticed the center cylinder inside the bowl had broken off. I really debated on getting a shiny brand new one (this one is at least 25 years old) but calmed down and bought a new bowl for only 25 bucks. Pretty cheap compared to a new $200 machine. But I said to my husband, I will not spend anymore money on parts. The next time something breaks on this machine, a new one I shall have!!
Baked Fried Chicken
This is actually a ‘kid’ friendly recipe. Well it was friendly to my kid: he liked it!! All recipes that I have in my ‘cookbooks’ are rated very good or excellent (good recipes are not made again) and also refer to whether my son liked it or not. Those were few and far between back in 2005. A different story now.
Baked Fried Chicken (adapted from Martha Stewart Living magazine)
6-8 pieces of chicken (this can consist of drumsticks, thighs or breasts, whatever combo, depending on what your family likes. It’s just important that they be similar in size so that they will be done at the same time)
1/4 cup olive oil
1/4 cup red wine vinegar
1/2 teaspoon Kosher salt
1/2 teaspoon dried oregano
1 garlic clove, minced
1 cup fresh breadcrumbs
1/2 cup grated parmesan cheese
Whisk together in a 9 x 13 inch glass baking dish, the oil, vinegar, salt, oregano and garlic. Add chicken to marinade, turning each piece a few times to make sure thoroughly coated. Cover with plastic wrap. Refrigerate for 1 hour or up to 8 hours. (I have only had the privilege of marinating this for an hour tops and it’s delicious.)
While chicken is marinating, combine the breadcrumbs (they need to be fresh!!) and cheese in a glass pie dish. Cover a rimmed baking sheet with heavy duty aluminum foil and spray with canola oil.
Preheat oven to 400 degrees.
Dredge each piece of chicken in breadcrumb mixture, do not shake off, keep as much of breadcrumb mixture on as possible. Place onto baking sheet. Pat any leftover breadcrumb mixture onto chicken. Spray chicken with canola oil spray.
Bake chicken for about 45-50 minutes, until chicken is cooked through and golden brown.
Coated with breadcrumb mixture:

Just out of the oven:

My husband’s beautiful plate, with salad and fresh beans:

My plate. Moist chicken inside, crusty on the outside: YUM!

Roasted Portobello and Prosciutto Lasagna
I have had this recipe in my ‘cookbooks’ for 8 years but had never tried it until last week. Maybe you can guess, I had a party, featuring lasagna. Most of the people I invited know I have a food blog so I was comfortable trying out a new recipe on them. If it was a flop I had the other 2 lasagna (Vegetable and Sausage) to count on and felt I had plenty of food with out the Mushroom lasagna. So I went ahead and tried it.
It’s not your traditional lasagna with tomato and mozzarella cheese and the ingredients are a bit on the expensive side. The prosciutto, Portobello mushrooms and the Gruyère cheese were all approximately $8 each. So if it turned out good, I thought it was well worth the extra expense. If not, well that was $24 down the drain.
It was a success! (phew: I sure sounded confident, haha!!) So give it a try, maybe on your family first. You do have to like mushrooms, though. So it might be a deal breaker for a few of you. I can’t really think of an appropriate substitute. Leaving them out really wouldn’t be a good option.
Roasted Portobello and Prosciutto Lasagna (adapted from Bon Appetit)
Filling
3 tablespoons plus 2 teaspoons of olive oil
2-1/2 pounds (about 10 large) Portobello mushrooms, stems removed
6 ounce chunk of prosciutto, cut into 1/4 inch squares (Boar’s Head Prosciutto di Parma is what I used. I got the imported one because the counter person said that was the best)
2/3 cup chopped shallots (about 2 large)
1 teaspoon chopped fresh rosemary
1 teaspoon chopped fresh thyme
Sauce
4 cups whole milk
1, 14 ounce can low-salt chicken broth
1/2 cup butter
2/3 cup flour
8 ounces grated Gruyère cheese
1/3 cup grated Parmesan cheese
9 ounce package of Barilla No Boil Lasagne Noodles
Heat oven to 400 degrees. Spray a large rimmed cookie sheet with canola oil. Pour 3 tablespoons of olive oil in a large bowl and taking one mushroom at a time, place in bowl and with your hands, cover mushroom with the oil. They are somewhat delicate so be gentle with them. Place mushroom gill side up on cookie sheet. Repeat process with the rest of the mushrooms. You should have a single layer of mushrooms. Place in oven and bake/roast for 45 minutes. Cool. Cut each mushroom into 1/3 inch slices.
While mushrooms are in the oven, heat 2 teaspoons of olive oil in medium skillet over medium heat. Add prosciutto and saute until browned, about 3 minutes. Add shallots, rosemary and thyme. Cook until shallots are tender, stirring frequently, about 5 minutes.
Bring milk and chicken broth to a simmer in a large sauce pan, over medium heat. Remove from heat and set aside. In another large sauce pan, over medium low heat, melt butter. Whisk in flour and stir for 2 minutes. Whisk in hot milk mixture, bring to a boil, stirring frequently. Reduce heat to low and simmer 5 minutes, stirring frequently. Remove from heat and add Gruyère and Parmesan cheeses. Stir to combine.
Reduce oven temperature to 350 degrees. Spray a glass 9 x 13 inch baking dish with canola oil. Spread 1 cup sauce over bottom of dish. Spread 5 noodles over sauce, overlapping to fit. Spread about 1-2/3 cups sauce over noodles. Arrange 1/2 of mushrooms over sauce. Scatter 1/2 of prosciutto mixture over mushrooms. Arrange 5 noodles over mushrooms, overlapping to fit. Spread 1-2/3 cups sauce over noodles. Arrange remaining mushrooms over sauce, sprinkle with remaining prosciutto and top with 5 noodles. Spread remaining sauce over noodles.
Bake at 350 degrees for about 45 minutes until golden brown and sauce is bubbling. Let stand 20-30 minutes before serving.
Mushrooms ready to go in the oven:

Mushrooms finished roasting:

Mis en place:

First layer with sauce, noodles, sliced mushrooms and prosciutto :

Ready to go in the oven:

This next picture should be of the lasagne out of the oven, golden brown and yummy.
I deleted it by mistake. Shame, shame, shame on me. Eventually I will make it again and will be sure to add the picture to this post. But I did not want to delay giving you this recipe because it is such a good one. So forgive me and enjoy!!
Sausage Lasagna
This is my standby recipe for lasagna. If you have never made a lasagna before, this is a great one to start with. The best part is that it includes its own sauce. There are so many lasagna recipes out there that list ‘tomato sauce’ as one of the ingredients and either you have to buy one or make your own, besides making the lasagna. I don’t really think that’s fair.
I love the sausage addition and I think the brand of sausage you buy makes a huge difference. Shoprite used to have this really good sausage but just recently, in the past year, they stopped selling it. Boy, was I upset. I have since tried many, many sausages trying to find one similar. I tried the sausage at Decicco’s, A&P, Turco’s, Stew Leonards, Adam’s Fair Acre Farm, Trader Joe’s…..finally the one at Hannaford’s turned out to be the most like Shoprites. So try a few sausages out before making the lasagna to find the one that tastes best to you.
Sausage Lasagna (adapted from Bon Appetit)
Sauce
2 tablespoons of olive oil
1/2 pound of spicy Italian sausages, casings removed (my favorite: Nature’s Place All Natural Hot Italian Pork Sausage from Hannaford’s)
1/2 pound of sweet Italian sausages, casings removed (my favorite: Nature’s Place All Natural Sweet Italian Pork Sausage from Hannaford’s)
1 cup chopped onion
3 large garlic cloves, chopped
2 teaspoons dried oregano
1, 28 ounce can crushed tomatoes (my favorite: Muir Glen Organic Crushed Tomato with Basil)
1, 14-1/2 ounce can petite diced tomatoes
Heat oil in heavy large pot over medium-high heat. Add sausages, onion, garlic, oregano and saute until sausage is cooked through, breaking up sausage into smaller pieces by pulling it apart with 2 forks, about 10-15 minutes.
Add crushed tomatoes and diced tomatoes with their juices, stirring everything together. Bring sauce to boil. Reduce heat to medium and simmer 5 minutes to blend flavors. (This can certainly be made ahead of time if you wish.)
Filling
1-1/2 cups packed fresh basil leaves
23 ounces of whole milk ricotta cheese (15 ounce container plus 8 ounces: you will have leftover ricotta which is not a bad thing if you like it on its own)
8 ounces of grated mozzarella cheese (my favorite is Sargento Artisan Blends Whole Milk Mozzarella, already grated)
2 ounces of grated parmesan cheese (my favorite is Stella Parmesan Cheese)
1 large egg
1/2 teaspoon salt
Put above ingredients into food processor, and using on/off buttons, process filling until just blended.
Assemblage
9 ounce package of Barilla No Boil Lasagne Noodles
16 ounces of grated mozzarella cheese (above favorite)
3 ounces of grated parmesan cheese (above favorite)
Preheat oven to 350 degrees. Spray 9 x 13 inch glass baking dish with canola spray.
Spread 1-1/4 cups of sauce on bottom of dish. Arrange 5 noodles on top. Drop 1-1/2 cups filling over noodles, in 3 dollops. Spread evenly over noodles. Sprinkle with 3/4 cup of mozzarella cheese and 1/4 cup of parmesan cheese. Repeat layer 2 more times. The final layer, spread the remaining sauce and top with the remaining mozzarella and parmesan cheeses.
Place dish on top of a rimmed baking sheet and put in oven. Bake for 45 minutes until hot and bubbly. If you think it needs to bake more, COVER with aluminum foil before any additional baking.
Finished tomato sauce:

Spreading the filling:

The first layer complete:

Ready to go in the oven (make sure to put on a cookie sheet):

Ready to eat, after 15 minutes of resting:

Vegetable Lasagna
My daughter has frequently referred to this recipe as mine. I finally asked her one day, why she said it was mine: she told me she had gotten it from me! haha!! I thought I had originally gotten it from my daughter and she had gotten it from someone at Woods Hole (Cape Cod, that is): now we are both confused but amusingly so.
The recipe origin is unknown but it’s a good recipe and worthy of a special occasion.
I know the ingredients are lengthy and the directions seem long but it’s definitely worth the time: you’ll see!!
Vegetable Lasagna
1, 9 ounce package of Barilla No Boil Lasagne
4 cups of Tomato Sauce or Victoria Marinara Sauce (the best substitute for the real stuff I have found)
4 tablespoons of chopped fresh basil
4 cups of grated mozzarella cheese (This is the only ‘already-grated’ cheese I believe in: Sargento Artisan Blends Whole Milk Mozzarella)
3 cups of grated parmesan cheese, about 2, 5 ounce packages of Stella Parmesan Cheese (This is my favorite brand, you will need to grate this yourself)
Spinach layer:
2, 10 ounce packages frozen chopped spinach
1 tablespoon olive oil
2 shallots, chopped
8 ounce ricotta cheese
1 egg
Cook spinach according to package directions. Drain in a mesh colander. Press on the spinach (for at least 1-2 minutes), removing as much liquid as possible. For an idea of ‘enough already with the pressing’, you should have about 1 cup of liquid. Discard the liquid.
Heat oil in skillet to one notch above medium. Add shallots and saute 2 minutes.
Put spinach, shallots, ricotta and egg in processor and puree. Put mixture in bowl and set aside.
Carrot layer:
1 pound of peeled carrots, cut into even chunks
2 tablespoons of butter
1/4 cup of minced onion
8 ounces of ricotta cheese
In a sauce pan, place carrots and cover with water. Bring to a boil and then simmer until soft, about 15-20 minutes. Drain.
Heat skillet to one notch above medium and melt butter. Add onion and saute for 3 minutes.
Put carrots, onions and ricotta in food processor and puree. Put mixture in bowl and set aside.
Zucchini layer:
5 medium zucchini
6 tablespoons of olive oil
3 garlic cloves, minced
Cut each zucchini vertically, getting about 3 nice slices from each (you will have a total of 15 slices).
Heat 2 tablespoons of oil in skillet, one notch above medium and add 1 minced garlic clove. Place 5 slices of zucchini in skillet and saute until nicely browned on each side, about 3 minutes per side. Place on a cookie sheet that has been covered with paper towels. Repeat procedure 2 more times with the rest of the zucchini.
Assemblage:
Preheat oven to 350 degrees.
Spray a 9 x 13 inch glass baking dish or an aluminum disposable lasagna pan with canola oil.
First layer: 1 cup tomato sauce, 1 tablespoon basil, 5 lasagne noodles, spinach puree, 1 cup mozzarella and 3/4 cup parmesan cheese.
Second layer: 1 cup tomato sauce, 1 tablespoon basil, 5 lasagne noodles, carrot puree, 1 cup mozzarella and 3/4 cup parmesan cheese.
Third layer: 1 cup tomato sauce, 1 tablespoon basil, 5 lasagne noodles, zucchini slices, 1 cup mozzarella and 3/4 cup parmesan cheese.
Final top layer: 1 cup tomato sauce, 1 tablespoon basil, 1 cup mozzarella and 3/4 cup parmesan cheese.
Put dish on baking sheet and place in oven. Bake for 40 minutes. COVER with aluminum foil (This will burn if you do not cover: learn from my mistakes. I had to make this twice for a party because I burned the first one. This is only acceptable for your immediate family.) and bake for another 20-30 minutes until bubbly and hot.
Now this creates alot of dishes, I know. So this is where the Gnomes come in very nicely: they clean up while you are cooking and then everything is done when the lasagne comes out of the oven!! Oh wouldn’t it be wonderful!!! But seriously, while various things are cooking, keep up with the mess by cleaning up a bit as you go along.
Spinach Layer:

Carrot Layer:

Zucchini Layer:

Ready to go in the oven:

Ready to EAT !! (after 15 minutes of resting: very important)

